Creating a Decision
The following how-to guide will walk through the steps required to create a decision using the Rules Designer in the Simple Language. The example shown is fairly trivial, however far more complicated decisions can be defined in much the same way.
Prerequisites
-
MPS (version 2022.3.1)
-
A model using the
com.iconsolutions.simple.devkit, or a devkit that uses it (e.g.v2Flo.devkit)
Steps
1. Create Decision Node
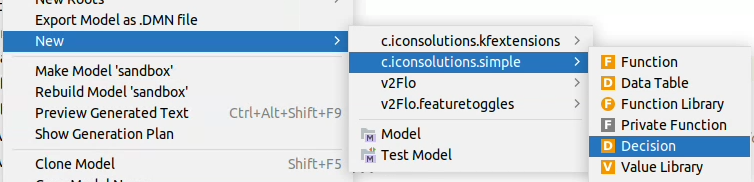
To add a decision into a model, go to the Logical View window on the left hand side of MPS and right-click on the model where the decision is required. Then navigate to New > com.iconsolutions.simple > Decision.
It should look like the image below:
2. Name Decision
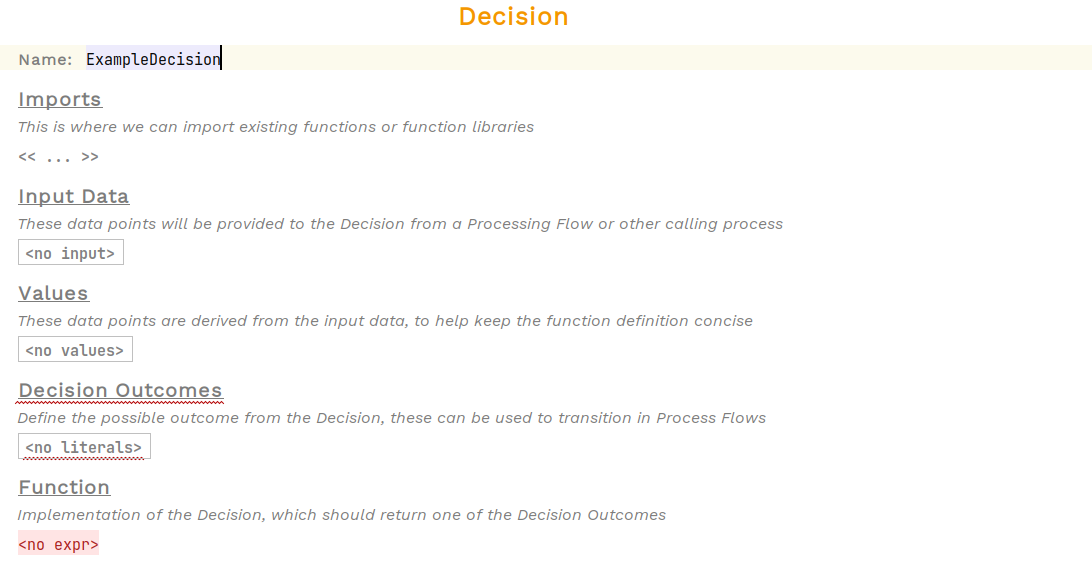
An unimplemented decision should have been created now. All decisions need a name so that they can be referenced elsewhere. Place the cursor on the red cell that says <no name> to the right of Name: and enter the decision’s name.
In the example below, the name is set to ExampleDecision:
3. Define Inputs
All decisions require at least one input. To add one, select the cell below Input Data that says <no input> and press enter. A table should appear with an empty row. Enter the input’s name and select a Java class type for it. To add additional inputs, place the cursor on a row of the table and press enter.
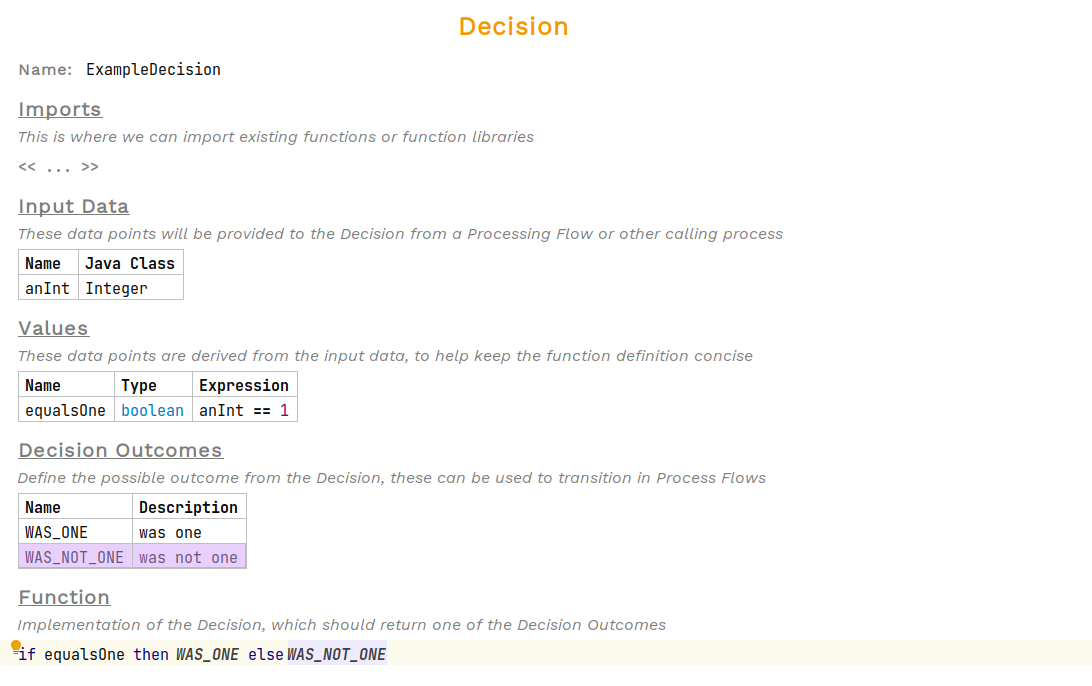
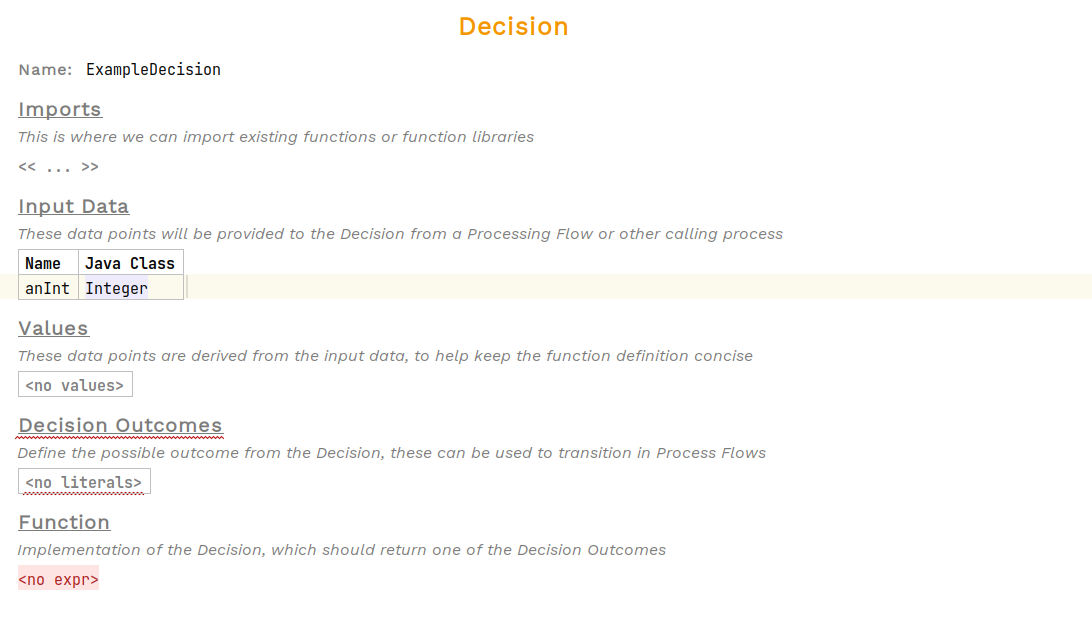
In the example below, a single input anInt of type Integer has been defined:
4. Define Values (optional)
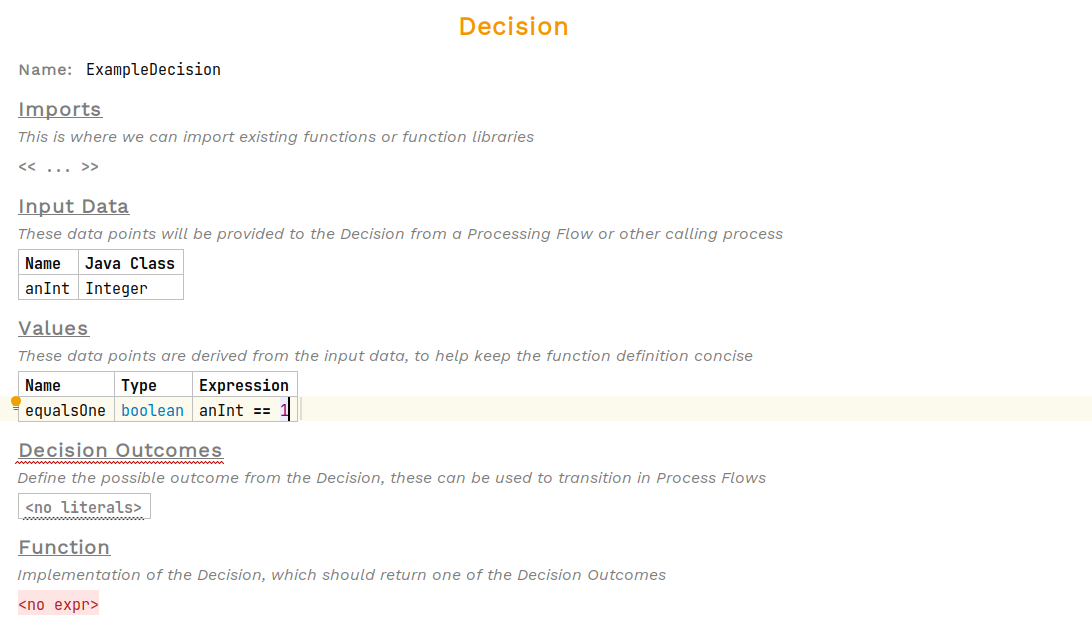
Decisions don’t need to define any values, but they can be particularly useful for deriving intermediate values from the input. To add one, select the cell below Values that says <no values> and press enter. A table should appear with an empty row. Enter the input’s name and select a type for it. The expression column allows writing a function to determine the value at runtime. To add additional values, place the cursor on a row of the table and press enter.
In the example below, a single value equalsOne of type boolean has been defined with the expression anInt == 1:
5. Define Outcomes
A decision should have at least two outcomes, which are the only permissible return values. To add one, select the cell below Decision Outcomes that says <no literals> and press enter. A table should appear with an empty row. Enter the outcome’s name and give it a description. To add additional outcomes, place the cursor on a row of the table and press enter.
In the example below, two outcomes have been defined, WAS_ONE and WAS_NOT_ONE:

6. Define Function Body
Finally, the decision needs a function to perform the decision-making. It must return a value that corresponds with the outcomes defined, there will be a typesystem error otherwise. To add the function, select the cell below Function that says <no expr> and type in an expression that returns a decision outcome.
To see a list of available expressions, press Ctrl + Space.
|
If a multiline expression is required, then typing { will create a block expression.
|
In the example below, an if expression evaluates the equalsOne boolean value and returns the outcome WAS_ONE if true, otherwise WAS_NOT_ONE: