Creating a Data Table
The following how-to guide will walk through the steps required to create a data table using the Rules Designer in the Simple Language. The example shown is fairly trivial, however far more complicated tables can be defined in much the same way.
Prerequisites
-
MPS (version 2022.3.1)
-
A model using the
com.iconsolutions.simple.devkit, or a devkit that uses it (e.g.v2Flo.devkit)
Steps
1. Create Data Table Node
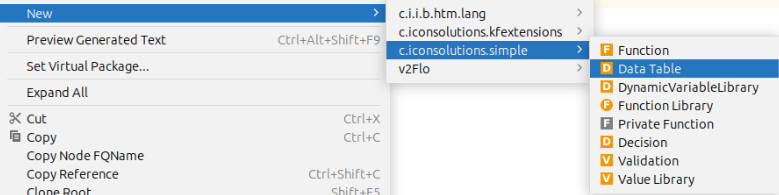
To add a data table into a model, go to the Logical View window on the left hand side of MPS and right-click on the model where the data table is required. Then navigate to New > com.iconsolutions.simple > Data Table.
It should look like the image below:
2. Name Data Table
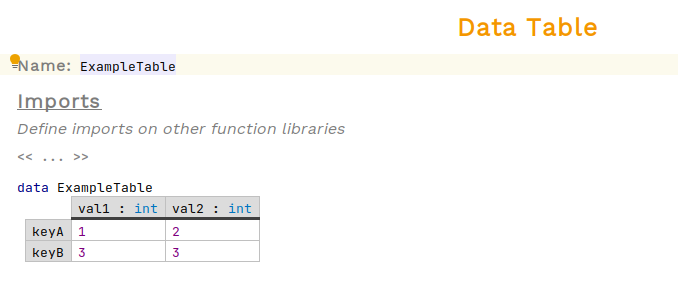
An unimplemented data table should have been created now. All data tables need a name so that they can be referenced elsewhere. Place the cursor on the red cell that says <no name> to the right of Name: and enter the data table’s name.
In the example below, the name is set to ExampleTable:
3. Define Columns and Rows
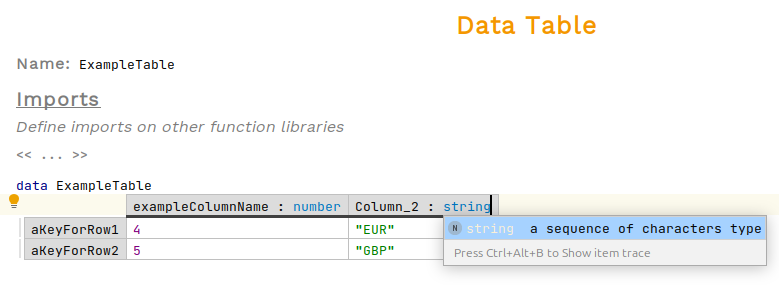
Data tables are made up of columns and rows. Each column has a name and a type. To add a new column, select a column header and press enter, for rows select a row name instead.
Row and column names should be unique and may use alphanumeric characters and underscores and can’t start with a number.
To choose a type for a column press Ctrl+Space to see a list of options. Each cell within a table should be of the type specified by the column it is in.
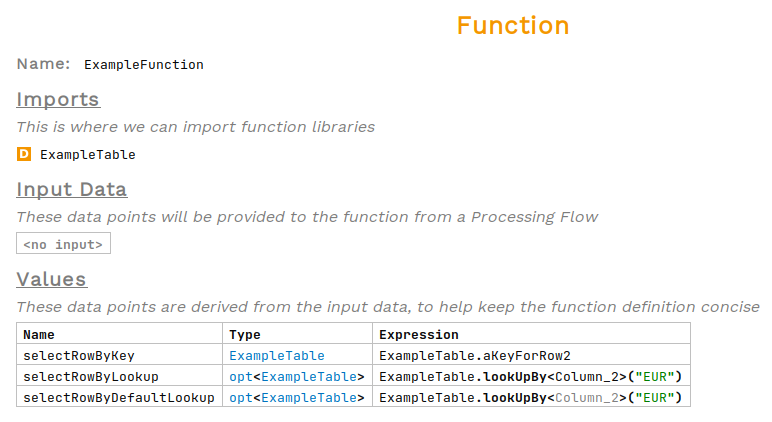
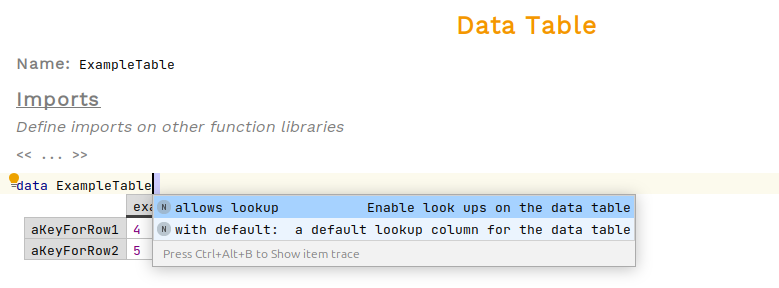
4. Table Lookup
The rows of the table are accessible by either the key of the row, or a table lookup. To do this, tables must be set to allow lookups first. Select the name of the table and press space followed by Ctrl+Space then select allows lookup. Additionally a default column can be chosen by also selecting with default.
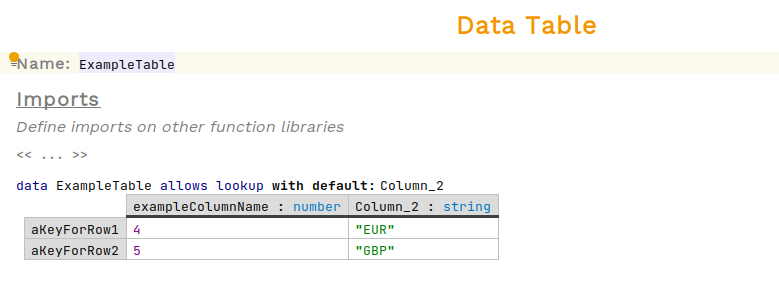
Once enabled, searching a table is done via dot operations within expressions. Lookups will an optional of the first row that matches the value, otherwise it returns empty.