Creando una Validación
La siguiente guía de cómo hacerlo le guiará a través de los pasos necesarios para crear una validación utilizando el Diseñador de Reglas en el Lenguaje Simple. El ejemplo mostrado es bastante trivial; sin embargo, se pueden definir validaciones mucho más complicadas de manera muy similar.
Requisitos previos
-
MPS (versión 2022.3.1)
-
Un modelo que utiliza el
com.iconsolutions.simple.devkit, o un devkit que lo utilice (por ejemplo,v2Flo.devkit)
Pasos
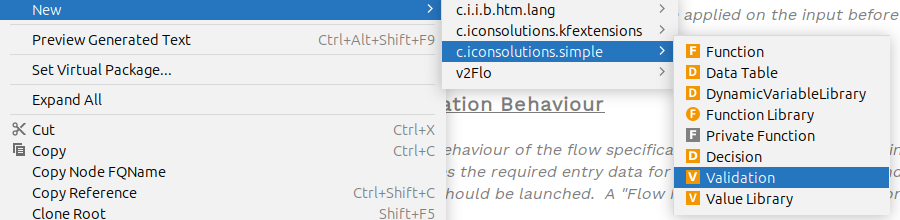
1. Crear Nodo de Validación
Para agregar una función a un modelo, diríjase a la Logical View ventana en el lado izquierdo de MPS y haga clic derecho en el modelo donde se requiere la validación. Luego navegue a New > com.iconsolutions.simple > Validation.
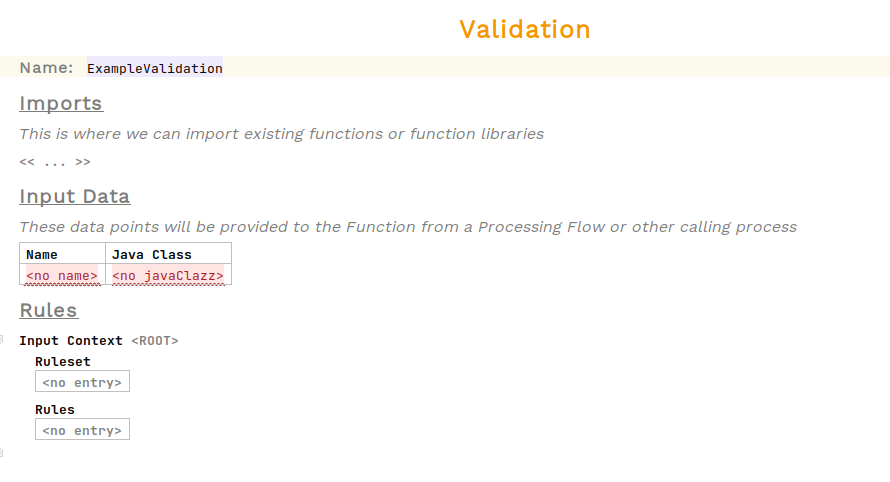
2. Validación de Nombres
Se debe haber creado una validación no implementada ahora. Todas las validaciones necesitan un nombre para que puedan ser referenciadas en otros lugares. Coloque el cursor en la celda roja que dice <no name> a la derecha de Name: y introduzca el nombre de la validación.
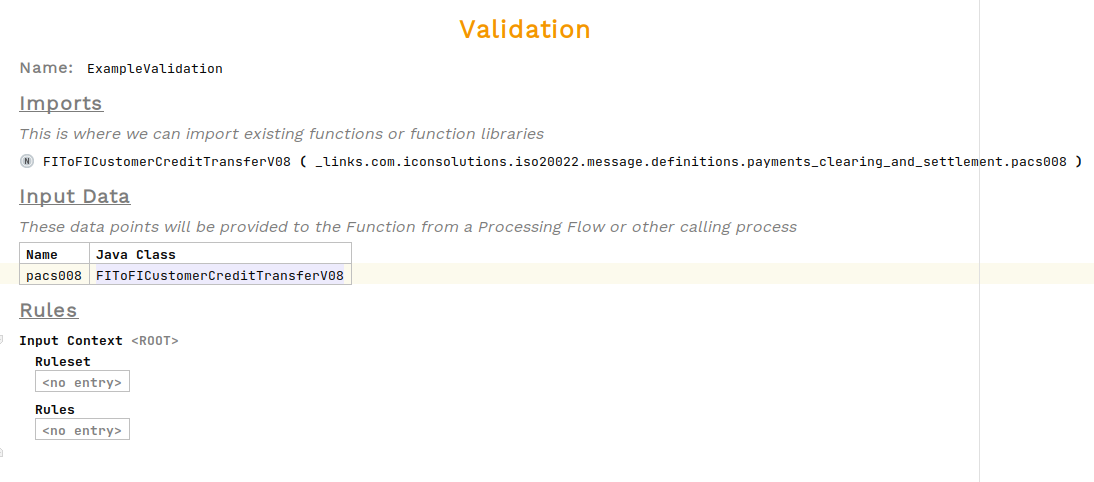
En el ejemplo a continuación, el nombre se establece en ExampleValidation:
3. Defina la Entrada
Las validaciones requieren una única entrada. Ingrese el nombre de la entrada y seleccione un Java tipo de clase para ello.
En el ejemplo a continuación, una entrada pacs008 de tipo FIToFICustomerCreditTransferV08 ha sido definido:
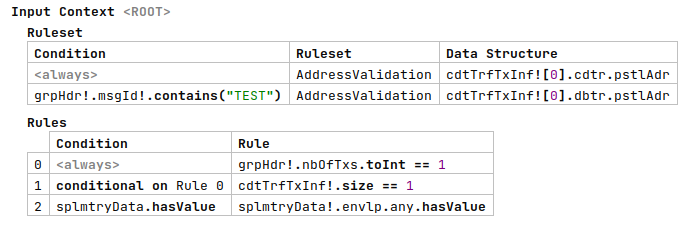
4. Elija el Contexto de Entrada
Para cada bloque de reglas, se debe elegir un contexto de entrada. Esto determina a qué componente de la entrada se aplican las reglas de validación. Las opciones son la raíz por defecto o cualquier campo directo de la entrada. Si un campo es una lista, las validaciones se aplicarán a cada instancia dentro de la lista.
En el ejemplo a continuación, se crean tres bloques con contextos de, la raíz, el encabezado del grupo y la transacción de transferencia de crédito:

5. Agregar Reglas
Las reglas constituyen las verificaciones individuales sobre la entrada para determinar si es válida o no. Cada una de ellas consiste en; una condición, una expresión, un código de error y una descripción del error.
Para agregar una nueva regla, coloque el cursor en una fila de la tabla y presione enter.
El campo condicional es una expresión que evalúa a un valor booleano. Si es falso, la regla dada será omitida. Por defecto, las reglas siempre se utilizarán. Las reglas también pueden ser condicionales en reglas anteriores.
El cuerpo principal de la regla es una expresión que devuelve un booleano. Para cada regla, el resultado final de la validación incluirá si la regla pasó, falló o fue omitida, junto con el código de error y la descripción en caso de fallo.
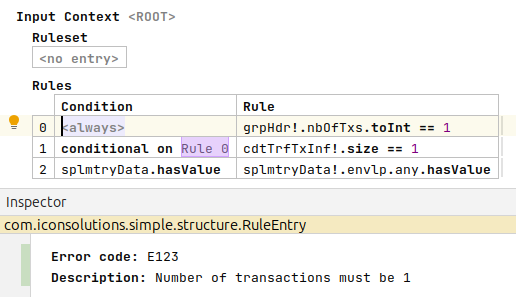
Para establecer el código de error y la descripción del error de una regla, se puede editar desde el inspector.
Para abrir el inspector, haga clic derecho y elija Inspect Node o utilice el acceso directo alt+2
|
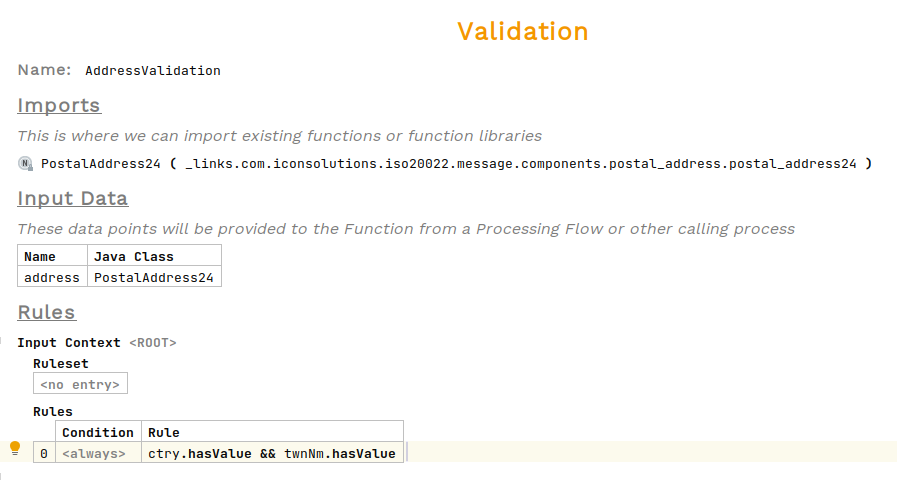
En el ejemplo a continuación, se definen tres reglas. Una sin una condición, la segunda con una condición sobre la primera y una tercera con una expresión como condición.
6. Agregar Conjuntos de Reglas
Los conjuntos de reglas permiten que las validaciones llamen a otros nodos de validación para su reutilización.
Cada conjunto de reglas tiene un campo condicional para determinar si debe ejecutarse o omitirse. Por defecto, la validación siempre se ejecuta, pero se puede utilizar cualquier expresión aquí.
La entrada para esta validación puede ser cualquier expresión, aunque generalmente este será un campo de la entrada inicial.
En el ejemplo a continuación, se creó un nodo de Validación de Direcciones separado y se invoca en las direcciones del acreedor y del deudor, con una condición de ejemplo para el deudor: