DSL 12 - Using custom business data
|
Getting Started
The tutorial step uses the "raise_additional_event" solution of the project as it’s starting point. If at any time you want to see the solution to this step, this can be found on the "add_custom_types" solution! |
What is custom business data?
Custom business data are the types of data we can create in our business data libraries. If you remember, the current library we set up we had:
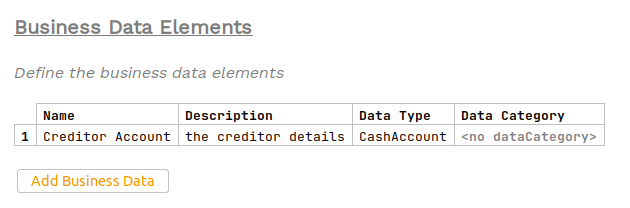
So here we were using the predefined "CashAccount" data type that comes from the Icon data model. What if we wanted to use our own bespoke types?
To demonstrate this, we’re going to create a new bean and add this to a new business data element to show how it can be used within the DSL.
DSL Setup
Defining the bean
First let’s create our custom bean - this is going to be placed in the domain-root/external-libraries project of the solution (NOTE - you will have to create the src/main/java directory and use package name com.iconsolutions.ipf.tutorial.external).
You’ll create a bean as follows:
package com.iconsolutions.ipf.tutorial.external;

import lombok.AllArgsConstructor;
import lombok.Builder;
import lombok.Data;
import lombok.NoArgsConstructor;

import java.io.Serializable;

@Data
@AllArgsConstructor
@NoArgsConstructor
@Builder
public class IpfTutorialBean implements Serializable {

    private String stringField;
    private int intField;

}
So that’s our simple object, note we’re using lombok here as a shorthand to setting up the appropriate class characteristics. You can add the dependency for lombok by adding it to the pom.xml:
<dependency>
    <groupId>org.projectlombok</groupId>
    <artifactId>lombok</artifactId>
</dependency>|
Important!
A key restriction here is that as the data points supplied need to be stored on the events, they MUST be json serializable. Business Data is persisted onto events in json form. |
Now that we’ve constructed our class, we need to make sure it’s been built and added to the mps setup, to do this we simply need to rebuild the project:
mvn clean installAdding the custom data
Let’s add a new business data element to our existing Business Data Library. You’ll give it a name of "Example Data" and a description of "Simple example data".
Now in the type select try and choose "IpfTutorialBean". You should find it’s not present.
To make it available, we simply press CTRL+R whilst on the selection box to bring up the search input. We then tick the checkbox at the top:

Note pressing CTRL+R for the second time will tick the checkbox too!
|
Top Tip
If you’re having trouble seeing your new class, try and then try again. 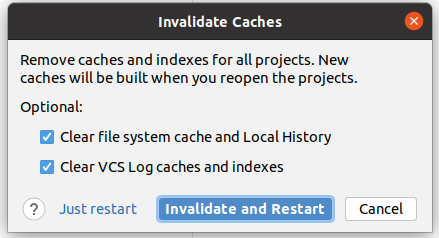
|
Search for the "IpfTutorialBean" and double click to add.
Then simply type "IpfTutorialBean" in the Data Type and should now be able to see and select our object. Once done, our business data element should look like:

For the purposes of testing, let’s add our sample data point to our the Initiation Behaviour of our InitiationFlow:

Finally, it’s good to look in the project view, if we scroll to the bottom of our model we can see:
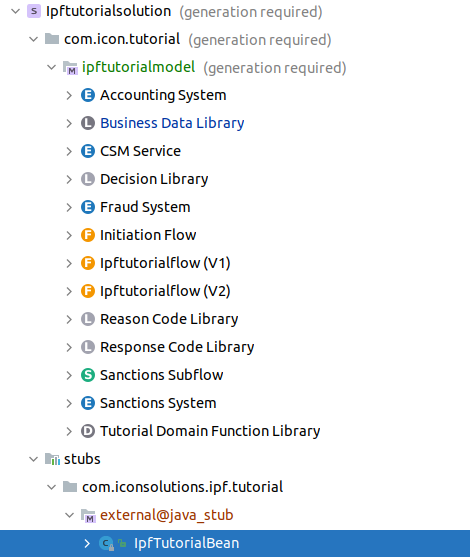
So here it shows us all the classes that have been included in this way.
That’s us done, we’ve added a custom business data element and used it to sent it in on initiation.
Java Implementation
Updating the initiation
To test this, we’ll simply add the new object into our initiation call. We will need to add the data point to our initiation controller, first we’ll need to rebuild to pick up our new changes:
mvn clean installAnd then once built we update our initiation controller to send in a new bean:
return Mono.fromCompletionStage(IpftutorialmodelDomain.initiation().handle(new InitiateInitiationFlowInput.Builder(entityId)
        .withProcessingContext(ProcessingContext.builder()
                .unitOfWorkId(unitOfWorkId)
                .clientRequestId(clientRequestId)
                .build())
        .withPaymentInitiation(samplePain001)
        .withExampleData(IpfTutorialBean.builder().intField(7).stringField("Test").build())
        .build()).thenApply(done -> InitiationResponse.builder().requestId(clientRequestId).uowId(unitOfWorkId).aggregateId(done.getAggregateId()).build()));
Checking our solution
As normal let’s now check out solution works. Start up the application as previously (instructions are available in Reviewing the initial application if you need a refresher!)
Then as normal we can send in a payment
curl -X POST localhost:8080/submit | jqThis time let’s look at the different events that have been received. If we now bring up the payment in the Developer GUI and bring up the flow view (search by unit of work id, click view, click domain events) and we should see the normal set of Domain Events. However, this time if we click to see the body of the initiation flow’s "Flow Initiated" event we’ll see that it now has the new example data object available at the bottom of the event definition:

Extending beyond simple classes
Adding your own libraries
We can also add in any Maven dependency we want to give access to the beans within it. This can be done simply by adding the dependency into the external-library dependencies pom. Go ahead and give this a go for a library of your choice and see if you can make it appear for you in MPS!
Branching beyond the "external-libraries" module.
The original tutorial project supplied us with a module called "Extended libraries" (under domain-root), this module is responsible for bringing in external dependencies. When you create your own project’s later using the scaffolder this folder will still be built for you. The key here is that this module uses Maven shading to collapse itself and any dependencies, so that MPS can find the files on the class path. We can see this on the pom of our module:
<!-- Shade everything, Maven still is the source of truth for the versions, but we can get a
     Smoother MPS experience if it "sees" a single library of dependencies
-->
<build>
  <plugins>
    <plugin>
      <groupId>org.apache.maven.plugins</groupId>
      <artifactId>maven-shade-plugin</artifactId>
      <version>3.2.4</version>
      <configuration>
        <createDependencyReducedPom>false</createDependencyReducedPom>
        <shadedArtifactAttached>true</shadedArtifactAttached>
        <shadedClassifierName>shaded</shadedClassifierName>
      </configuration>
      <executions>
        <execution>
          <phase>package</phase>
          <goals>
            <goal>shade</goal>
          </goals>
        </execution>
      </executions>
    </plugin>
  </plugins>
</build>
Then the external library is referenced in the MPS model for the project so it can be looked up. We can do this to any module we wish.
Conclusions
In this section we looked at:
-
Creating our own java types and importing them as custom business data elements.
-
Reusing other external java types by importing them through Maven dependencies.
|
Now having configured looked at reuse of java types, let’s look at the next stage of reuse - DSL 13 - Using shared concepts (Part One - Within a Solution) |