Tutorial Introduction
Getting Started
Using an Icon Provided AWS Environment
When using the Icon supplied AWS environments, the setup is completed for you and there’s nothing else to do. The core project has been downloaded onto the desktop for you in the 'ipf-tutorial' folder. At various times, the tutorials will refer to the '<install-root>' of the tutorial project - for you this is just his desktop/ipf-tutorial folder.
If you have a look in there, you’ll see a 'solutions' folder containing the various solutions to each step of the tutorial. You’ll start by using the 'initial' solution.
Setting up your own Environment
If you’re using your own environment, you’ll need to make sure you have the following installed before starting this tutorial:
You’ll also need access to the project repositories are stored in bitbucket. We recommend you use a git client for retrieving the projects, although they can be downloaded through the website also. Please take a note of the location you install the project too as this will be needed in the later tutorials.
|
If you can’t access the tutorial repository, please contact Icon support (support@iconsolutions.com) who will be able to assist. |
The preferred approach to run the sample application is using containers: docker containers. However, the tutorial can run as a standard Java application providing that access is available to MongoDB and Kafka.
Concepts to be Aware of
Please note that this tutorial assumes a basic working knowledge of:
-
The sample application uses the Spring Framework
-
Event Sourced applications - this means that for every change made to a payment we will raise an event. These events represent a definition of the change, including all the data points that have been altered.
-
Maven as a build tool
-
At the core of IPF is the DSL - this is Icon’s payment language which allows you to define payment flows. It’s used within Jetbrains MPS to create flows and will generate a set of Java components that form the basis of any implementation. These components use Hexagonal Architecture (aka Ports and Adapters) which separates areas of concerns by interfaces (Ports) and then implementing them using adapters.
Introducing the Basic Application
This tutorial starts by building a simple application that uses some of the core components of IPF. Let’s start by defining a few key things:
-
A Flow - a flow is a single payment process.
-
An IPF Domain - an IPF Domain is the container around one or more flows. It provides the API for accessing and working with those flows.
-
An IPF Application - an IPF Application in this case is a simple spring boot application that provides an environment onto which an IPF domain can execute.
-
An Event - the IPF processing module works by processing events.
-
The Journal Data Store - the journal data store is the master IPF Data store that contains all the events. For this tutorial, we use Mongo.
Putting this all together, our initial application is setup like this:

Using the Tutorial Code
The tutorial application is broken into four folders:
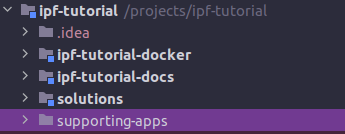
These contain:
-
ipf-tutorial-docker : this contains the supporting components of the application in a docker setup. This allows the simple spin up of a docker environment that contains the necessary supporting containers (mongo, kafka, simulators etc.)
-
ipf-tutorial-docs : this contains this tutorial documentation in ascii doc format!
-
solutions : in here are the solution code to every section of this tutorial.
-
supporting-apps : some sections of this tutorial require access to simulator apps. The sections in here explain how to use these.
So to start, open in IntelliJ <install-root>/solutions/initial/pom.xml. This will load up the initial version of the application. We can use this throughout our work with the tutorial, building upon it at each step of the tutorial to enrich our application.
However, if at any stage you need to change to the expected code, you can simply jump to the solution by opening: install-root>/solutions/<tutorial-name>/pom.xml instead!
Navigating through the Tutorial
This tutorial is broken into a number of different learning paths.
It’s recommended to start here: Reviewing the initial tutorial application
Once complete you can work your way through the DSL Path:
These DSL tutorials build up a complex flow to demonstrate how to use different features of the DSL.
Once complete, we delve a little further into implementation and focus on interacting with other systems in the connector path:
We then look at some of the runtime considerations in:
And finally we look at how to boostrap your own application through:
|
The tutorial is principally aimed at engineers, however there are many sections - particularly the DSL path that much of the work can be done without any engineering work, and those engineering sections could be skipped if required. Throughout the tutorials it is made clear where engineering knowledge is required. |