REUSE1 - Creating a Reusable DSL Library
This section covers how to create a reusable DSL library. By this we mean:
-
A set of DSL components that can be plugged into a different implementation (flow) project.
-
The actual implementation code for those components.
By creating a reusable library in this way, we can create components that are just plug and play.
Create a new project
The first thing we need to do is create a new project. Let’s do this using the project scaffolder:
mvn com.iconsolutions.ipf.build:ipf-project-scaffolder-maven:X.X.X:scaffold \
-DipfVersion=XXXX.X.X \
-DincludeBusinessFunctions=n \
-DincludeSampleSystems=n \
-DincludeApplication=n \
-DincludeE2E=n \
-DuseBuildScripts=y \
-DsolutionName=librarysolution \
-DmodelName=librarymodel \
-DprojectName=reuselibrary \
-DgroupId=com.iconsolutions \
-Dversion=0.0.1-SNAPSHOT \
-DartifactId=tutorial-reuse-library \
-DoutputDir=tutorial-reuse-library| Replace X.X.X and XXXX.X.X with the appropriate scaffolder and IPF version numbers. The versions must be compatible and can be found in IPF’s release documentation. |
| The properties defined here should be familiar, but the key thing to note here is that when defining reusable libraries we must set the value of useBuildScripts to 'y'. This tells the project to include the settings that allow the MPS zip file to be included and published. Without it, we will be unable to pull this into another project correctly. |
Note that we haven’t included the E2E or application modules here. This is because, in this scenario, the library will not be a standalone ("runnable") solution.
Creating the reusable library
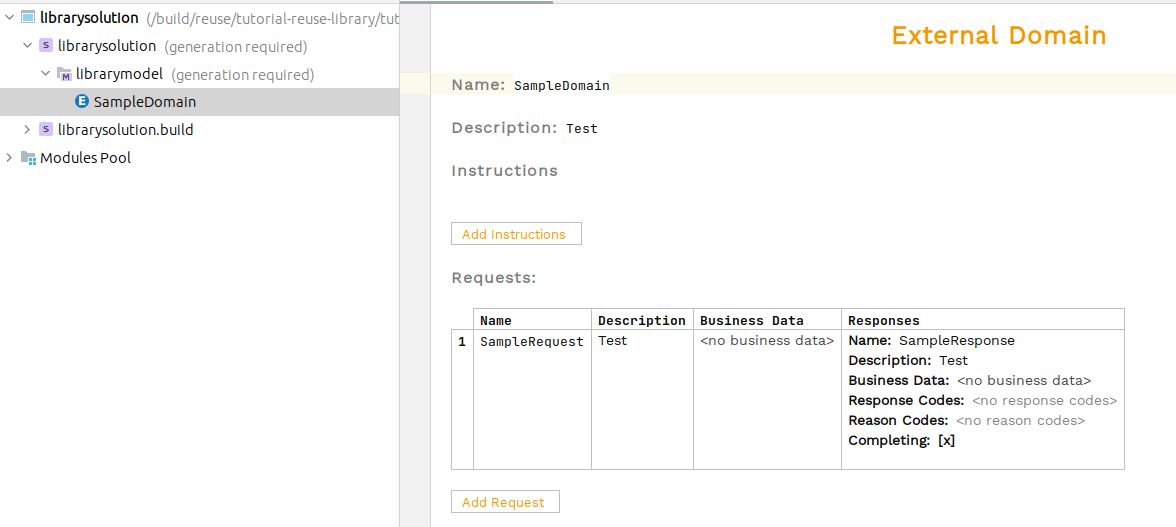
Now let’s jump into creating the project. To begin with, build it and open it in MPS just like we would with a normal flow project. We’ll see here though that instead of creating a flow, it provides you a sample external domain:
We’ll make things simple here and just implement this. Let’s dive into our code project. The first thing to note is that the service project here is just like any other IPF project we’ve built previously and indeed all the same approaches are applied.

In our config class we can see the standard domain creation:
@Bean
public LibrarymodelDomain librarymodelDomain(ActorSystem actorSystem, Dispatcher floDispatcher) {
    // All adapters should be added to the domain model
    return new LibrarymodelDomain.Builder(actorSystem)
            .build();
}
For this demo, we’re just going to apply a simple 'bounce back' routine, i.e. immediately returning a sample domain response back into the domain itself. Obviously, in actual implementations we’d do something else here like calling a remote system.
@Bean
public LibrarymodelDomain librarymodelDomain(ActorSystem actorSystem, Dispatcher floDispatcher) {
    // All adapters should be added to the domain model
    return new LibrarymodelDomain.Builder(actorSystem)
            .withSampleDomainActionAdapter(action -> LibrarymodelDomain.sampleDomain().handle(new SampleResponseInput.Builder(action.getId()).build()).thenAccept(done -> log.info("Completed a call into the sample domain.")))
            .build();
}
That’s it, our reusable domain is done and ready to use! Firstly, let’s build it. If you then look in your maven repository you’ll see:
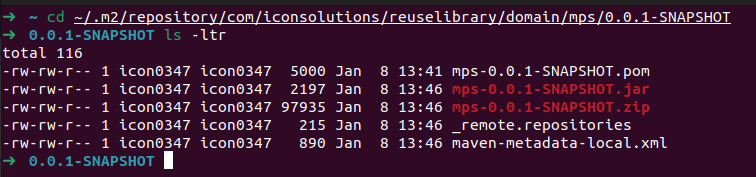
Here, the important thing to note is the creation of the zip file. A zip is the MPS equivalent of a standard jar file in maven.
Now let’s now try and use it.
Using the library
Let’s start by creating a new project. This time we’ll make a flow based project:
mvn com.iconsolutions.ipf.build:ipf-project-scaffolder-maven:X.X.X:scaffold \
-DipfVersion=XXXX.X.X \
-DincludeBusinessFunctions=n \
-DincludeSampleSystems=n \
-DincludeApplication=y \
-DincludeE2E=n \
-DuseBuildScripts=n \
-DsolutionName=clientsolution \
-DmodelName=clientmodel \
-DprojectName=reusetest \
-DgroupId=com.iconsolutions \
-Dversion=0.0.1-SNAPSHOT \
-DartifactId=tutorial-reuse-client \
-DoutputDir=tutorial-reuse-client| Replace X.X.X and XXXX.X.X with the appropriate scaffolder and IPF version numbers. The versions must be compatible and can be found in IPF’s release documentation. |
Looking at the above command, you can see we’ve changed the values of our flags to: create an application project, and not use build scripts. This will provide a basic flow project for us to use.
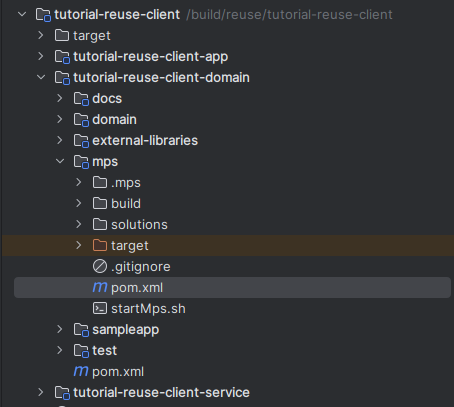
Before we start, let’s add the dependency to the new library we’ve created. To do this, open the pom.xml for the mps module:
Then in the maven-dependency-plugins section add the following execution:
<execution>
    <id>unpack-tutorial-library-plugin</id>
    <phase>initialize</phase>
    <goals>
        <goal>unpack</goal>
    </goals>
    <configuration>
        <artifactItems>
            <artifactItem>
                <groupId>com.iconsolutions.reuselibrary.domain</groupId>
                <artifactId>mps</artifactId>
                <version>0.0.1-SNAPSHOT</version>
                <type>zip</type>
                <overWrite>true</overWrite>
                <outputDirectory>${plugin_home}</outputDirectory>
            </artifactItem>
        </artifactItems>
    </configuration>
</execution>
The key values here to note:
-
id - this can be anything. The key thing is to ensure its uniqueness against other executions. As a good practice, a definition like here that explains what it’s doing is good.
-
groupId - this will be of the format: <maven-group-id>.<project-name>.domain, where the maven-group-id and project-name are as defined in the creation command previously. If you did not provide a project name as part of the creation command the solution name becomes the project name. Note you can always check your values by looking at the path in the repository.
-
artifactid - this will be mps.
-
version - this is the maven version of the library project.
That’s all we need to do for now, so let’s go ahead and build our project. This will pull in the dependencies just like any normal maven project. Once finished, let’s open up MPS, and we’ll see we have the standard example flow:

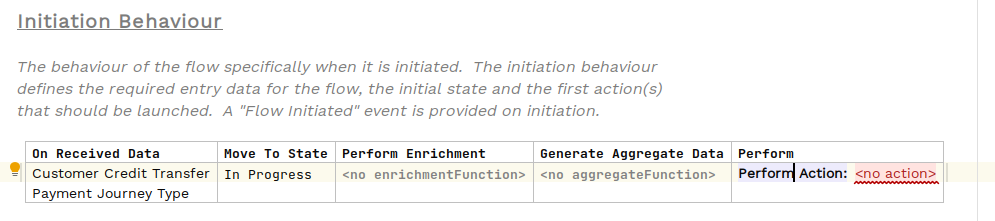
We’ll add a simple extra step into our flow to call our new reusable function. To do this, create a state 'In Progress' and then change the initiation behaviour to call it. Finally, opt to perform an action - for now you won’t have any actions to choose, so it should be like this:
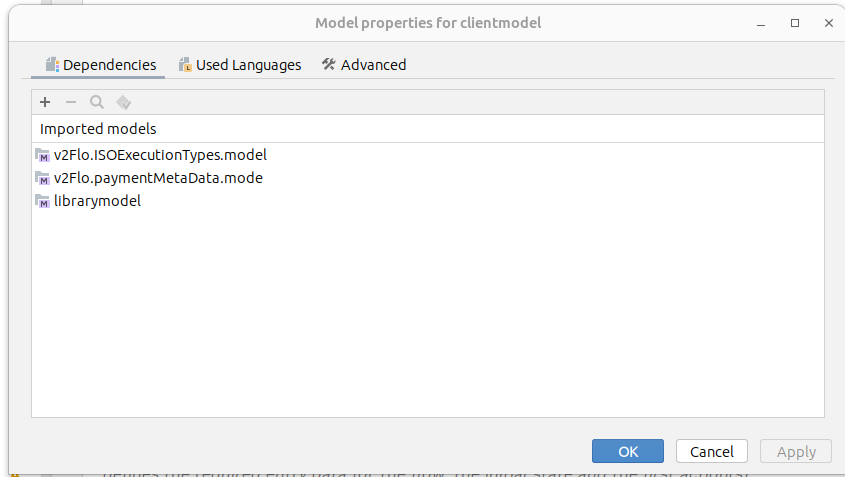
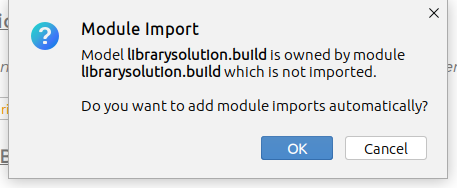
Now we choose to import our new library. To do this, we simply press Ctrl+R twice to bring up the import box as usual and then search for our SampleDomain.

We’ll be prompted to import the model.
And the finally we should be able to reuse the library.

Complete the flow, as appropriate, by adding in:
-
An event for when the reply is received, say 'Response Received'.
-
An input behaviour that maps the sample response to the new event.
-
An event behaviour to complete the flow when the event is received.
Finally, we need to tell our application where to get the implementation of our sample request domain. To do that, we simply add in the service dependency of the library project to our client service project:
<dependency>
    <groupId>com.iconsolutions</groupId>
    <artifactId>tutorial-reuse-library-service</artifactId>
    <version>0.0.1-SNAPSHOT</version>
</dependency>
Now lets build our project again, and then spin it up (note you’ll need a running mongo and developer-app for the application to start correctly). Then we can send the normal example curl request to trigger a payment, which you can then view in the developer app to check it’s been successfully processed and use our library domain: