DSL 4 - Using an External Domain
|
Getting Started
The tutorial step uses the "add_domain_function" solution of the project as it’s starting point. If at any time you want to see the solution to this step, this can be found on the "add_external_domain" solution! |
In this section we’re going to investigate how we can request information from external systems and receive their responses.
What is an External Domain?
From the DSL perspective, an external domain is any other domain with which we need to interact. This is what we refer to as an "External Domain". Usually this is another bank system like Fraud or Accounting but could be for example another IPF system.
We can interact with an external domain in three key ways:
-
Via an "Instruction" - these are when the external domain pushes information to us.
-
Via a "Request" - this is when we ask for information from an external domain.
-
Via a "Notification" - this is when we push information to an external domain.
As an example for our flow, we’re going to add a step to our flow that allows us to make a call out to an Accounting System that will validate our account.
From a logic point of view, here we want to send out the account information and retrieve back whether the account is valid. To make it slightly more complex we’ll say that the account system can return three responses:
-
Success
-
Failure
-
Not Found
And in the case of failure we’ll say that the failure can be because the account has been blocked or some unknown exception has occurred.
Therefore, in our example we are "asking" for data, hence we will use a request in this case.
DSL Set Up
Setting up the Response and Reason Codes
In DSL 3 - Using a Domain Function, we used the default "AcceptOrReject" response codes to determine the result of the domain function call. Here we have defined a slightly more challenging requirement which requires the use of both the request and response code concepts.
The Response Codes
Firstly, lets consider the response codes. We have three outcomes "Success", "Failure" or "Not Found". So let’s add these as a new response code set that we can use.
If we right-click on our model and choose we should be presented with this screen.
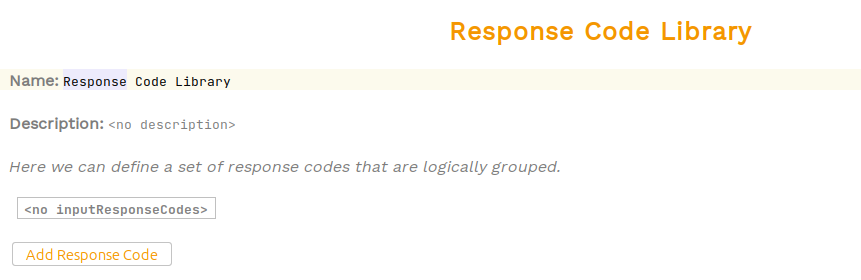
Here we can provide the name of our library and then enter the response codes within in. So let’s call our library 'Account Validation Response Codes', provide a suitable description and then click on the "Add Response Code" button - this will show us a new table containing the response codes. Let’s set them up as follows:
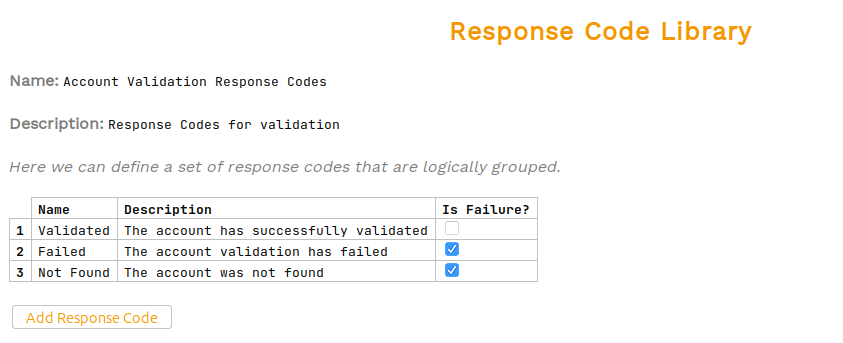
Note here that for the "Failed" and "Not Found" options we’ve ticket the is failure box. This tells the DSL that these response codes are failure based and that it should store the failure reasons against the payment for analysis.
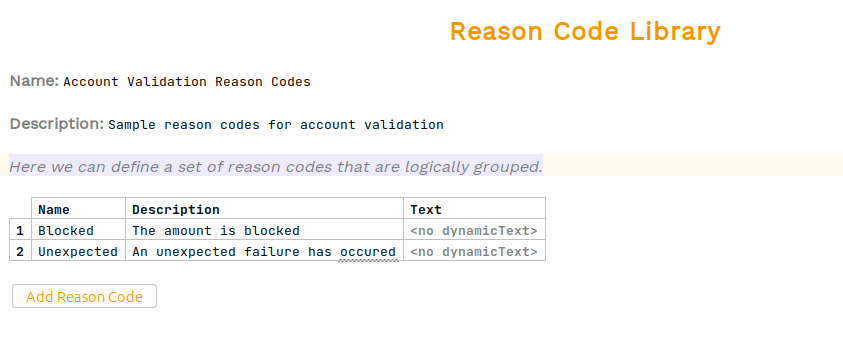
The Reason Codes
Having set up our response codes, let’s now do the same for the reason codes - it’s essentially the same process but using the reason code library instead of response codes. If you set it up correctly it should look like:
|
Alternate Definitions
In this tutorial we have defined the account validation outcomes as a combination of response and reason codes. There are many different ways you may choose to set up your flow depending on your requirements and what work’s best for you. For example, just as valid would be to set up a set of four response codes where 'Blocked' is also represented in that way. |
Now we’ve set up our response and reason codes, let set up the external domain and use them within it.
Adding an External Domain
The first step is to add the Accounting System as an external domain, similar to when we created the domain function library. To do this we select the process flow (IpftutorialFlow) and right click then select . This should bring up the following view:
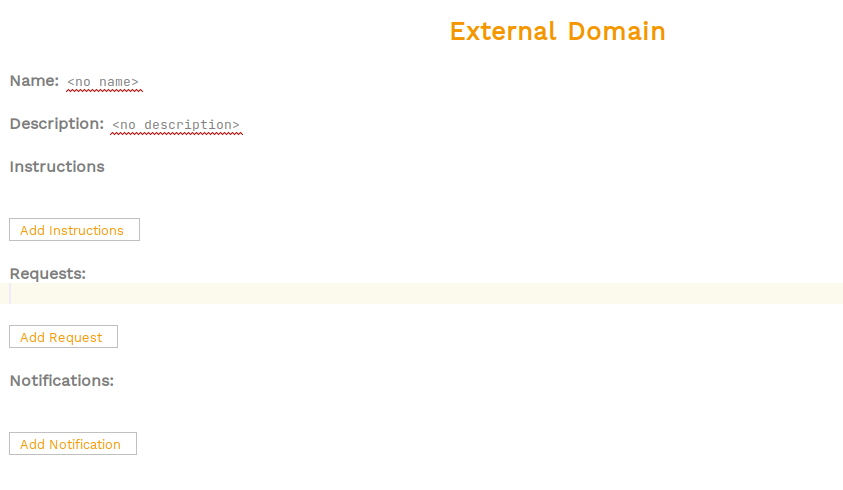
Let’s add a name and a description to start:
-
name - Accounting System
-
description - A sample account system
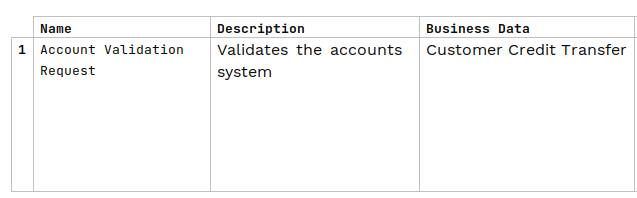
For our requirement we’re going to ask the account system to validate our data, so we should model this as a "Request". So let’s click the add request button and then supply:
-
a name of "Account Validation Request"
-
a description of "Validates the accounts system"
-
the business data containing the "Customer Credit Transfer"
This is now a function we could call from our flow, that will take the customer credit transfer we’ve received from the payment initiation and send it onto the accounting systems validation capabilities. Note here if the accounting system had a specific format that it required, we could define it here and use the IPF mapping capabilities to transform to it. More on that later…
Note that as per previous, we can see that our request has been highlighted as invalid as we haven’t yet completed it.
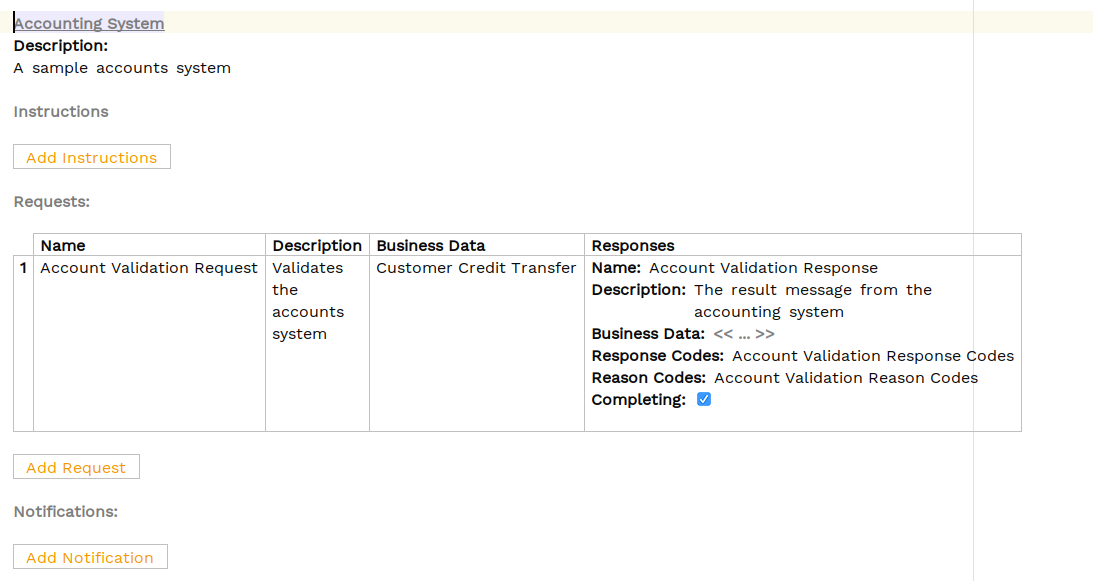
Next we need to add our response, so like domain functions, press return in the "Responses" section and then we’ll define:
-
a name of "Account Validation Response"
-
a description of "The result message from the accounting system"
-
no business data
-
a response code set of "Account Validation Response Codes" ("CTRL + Space" to list & select )
-
a reason code set of "Account Validation Reason Codes" ("CTRL + Space" to list & select )
-
a completing flag set to true
When complete, the external domain should look like this:
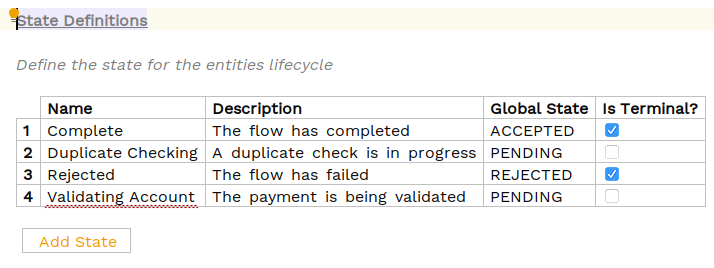
Updating the Flow
Having created our external domain we need to plug it into our flow, so lets go back to the flow and start by adding a new status for when our application is validating the account:
States
|
Top Tip
To shuffle the order of table entries hold down "Shift + Ctrl" and use the up/down arrows. |
Events
Now we’re going to add three new events on our flow:
-
one for when the check passes
-
one for failure
-
one for not known
We as normal do this by clicking the "Add Event" button on the flow and then entering the details as below:

Input Behaviours
As with domain functions, the handling of the responses from the accounting system are handled as "Input Behaviours". So let’s click the "Add Input Behaviour" button and add input behaviours for each of our options and then entering the details as below. Again we’ll use the CTRL + SPACE to select the input of the request we created above, then select both the first response code, i.e. Accepted, then select the relevant event "Fraud OK". Repeat for response code "Rejected" for event

Finally, we need to plug in both the call to the validation system and how we handle the receipt of our three events into the "Event Behaviour" section of the flow.
Event Behaviours
Let’s start by adding in the call to the new validation request. Previously, on receipt of the duplicate checking confirmation (event - "Duplicate Check Passed"), we were completing the flow. Now let’s change this so that instead we move to our new "Validating Account" state and call the "Account Validation Request". We do this by choosing to perform an action and then selecting our request. This should like the below when done:

Now it’s calling the request, we need to handle the response. In our case, we’re going to say that success goes to complete whilst both not found and failed will go to our rejected state.
For the failure case, we’ll use a new feature of the event behaviour that we’ve not seen before - the ability to use the "On Any Of" when condition. This means we can say when either the "Account Not Found" or the "Account Validation Failed" event arrives, we can perform the same functionality.
We do this just as before, except choosing "On Any Of" from the "When" drop down. Once we’ve selected the first of our two events, we simply press return and then can use our normal selection approach to pick another.
Once complete this should like:

That’s now all the flow definition work complete, but before moving on let’s open the flow viewer again (Tools > Open Flow Viewer) and see our new diagram.
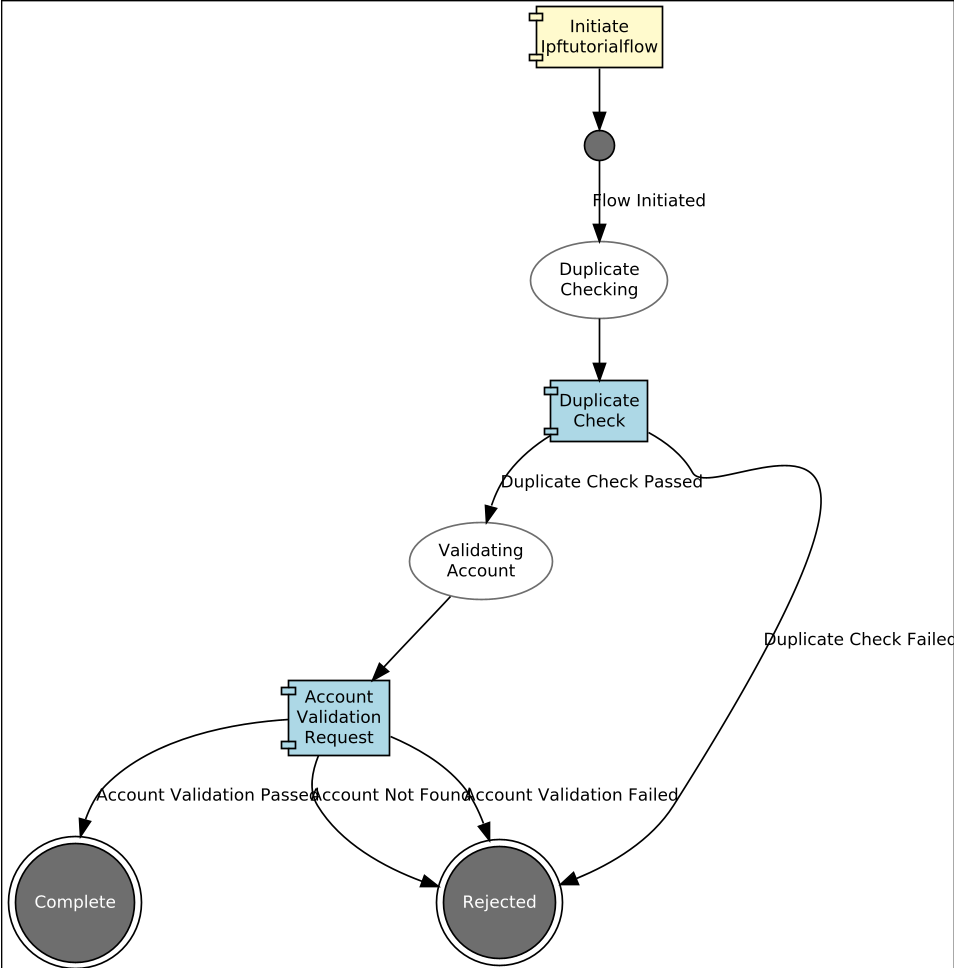
And as expected here, we can see that we have now included our account validation request in our happy path.
Now we look at the implementation side of this, if you’re not interested in this then you can jump straight to the exercise.
Java Implementation
Let’s now switch back to Intellij and look at how we plug this into our implementation code. As normal, we’ll start by running a build from a terminal window in the root directory of our project:
mvn clean installOnce built, we can again look at the generated code in /domain-root/domain/target, and we should now find the port for calling out to our accounting system like this:
package com.iconsolutions.ipf.tutorial.adapters;

import om.iconsolutions.ipf.tutorial.actions.AccountValidationRequestAction;
import java.util.concurrent.CompletionStage;

public interface AccountingSystemActionPort {
    CompletionStage<Void> execute(AccountValidationRequestAction var1);
}
So just like with our domain functions, this is what we need to implement in order to be able to call out to our external systems. This is the point that in a typical implementation we would use the connector framework to make a call out to the external system over a protocol (e.g. kafka). You’ll deal with the connector framework later in this tutorial series so for now we’ll use another feature of our generated code - the sample application.
First we need to add the dependency to the sample app, we do this by adding the following dependency into the pom for the ipf-tutorial-app (ipf-tutorial-app/pom.xml).
<dependency>
     <groupId>com.iconsolutions.ipf.tutorial.{solution}.domain</groupId>
     <artifactId>sampleapp</artifactId>
     <version>${project.version}</version>
</dependency>|
Note that solution will be whichever solution folder you are currently working in e.g. initial would be com.iconsolutions.ipf.tutorial.initial.domain. If build from the scaffolder it’s just ipftutorialsolution. |
If we look inside the sample app project (domain-root/sampleapp/target/generated-sources/com/iconsolutions/ipf/tutorial/ipftutorialmodel/sample_app/adapter) we can see sample implementations of all of our ports. Functionally all these do is return with the first response code available to it, but they are sufficient to be able to get a running application going. This makes them extremely useful as they can be used immediately to get our application running and then swapped out one by one as real implementations are developed.
Let’s now add the sample AccountSystemActionPort implementation into our configuration. We do that by going back to our IpfTutorialConfig and adding an extra line:
@Bean
public IpftutorialmodelDomain init(ActorSystem actorSystem) {
    // All adapters should be added to the domain model
    return new IpftutorialmodelDomain.Builder(actorSystem)
            .withDomainFunctionAdapter(input -> CompletableFuture.completedStage(new DuplicateCheckResponseInput.Builder(input.getId(), AcceptOrRejectCodes.Accepted).build()))
            .withAccountingSystemActionAdapter(new SampleAccountingSystemActionAdapter())
            .build();
}
Here we can see we’ve added a declaration to use our SampleAccountSystemActionAdapter.
That’s everything we need to do to add a simple implementation of our call to the accounting system. In later sections we’ll provide more complex examples and how we could use Icon’s connector framework to call out to real systems.
Checking our Solution
We’re now ready to go and run our application again, Let’s start up the application as previously (instructions are available in Reviewing the initial application if you need a refresher!)
Then we can send in a payment:
curl -X POST localhost:8080/submit | jqAnd finally if we bring up the payment in the Developer GUI and bring up the domain events tab (search by unit of work id, click view, click domain events)

Here we can see we now have three events coming through including our new "Account Validation Passed" as the 3rd event.
Exercise
As an exercise let’s add another step to our flow. Let’s imagine we need to run a fraud check as part of our flow. The requirements of the fraud check service we will call are:
-
It takes a pacs008 as input data.
-
It can return either a pass or fail.
-
We only run the fraud check if the account has been successfully validated.
-
If the check fails, the payment should be rejected.
-
If the check passes, the payment should be completed.
Go ahead and try to implement a solution for this. Use the query service to check that your new Fraud capability has been invoked.
When ready you can compare your solution to the "add_external_domain" solution.
Conclusions
In this section we:
-
successfully created our first external domain which allowed us to simulate making a call out to an external accounting service.
-
set up a request within our domain and integrated that into our event behaviour to send a request and later receive a response from the account system.
-
had a light touch introduction to response codes!
|
Now having configured our application to make calls to an external service, let’s discover how to use routing logic in our flows via: DSL 5 - Using a decision |