Step 6 - Add a Business Data Library
Introduction to Step 6
In this step you are going to add more business data by creating a business data library to the flow by importing it.
Up to now you have been using a Customer Credit Transfer Request (i.e. Pacs008) in the flow. There is a lot of data in a Pacs008, much of it unused in the payment flow. If you like, you can break down the Pacs008 into smaller elements, and one way of doing this is by using an aggregate function within the flow to split the Pacs008 as soon as the flow is initiated.
You will need to import the message components and message elements that you will want to add.
You will also add some business data to a response and propagate that in the payment flow as well. This will be a reservation reference supplied by the debtor agent’s accounting system in response to a validation request.
Create a Business Data Library
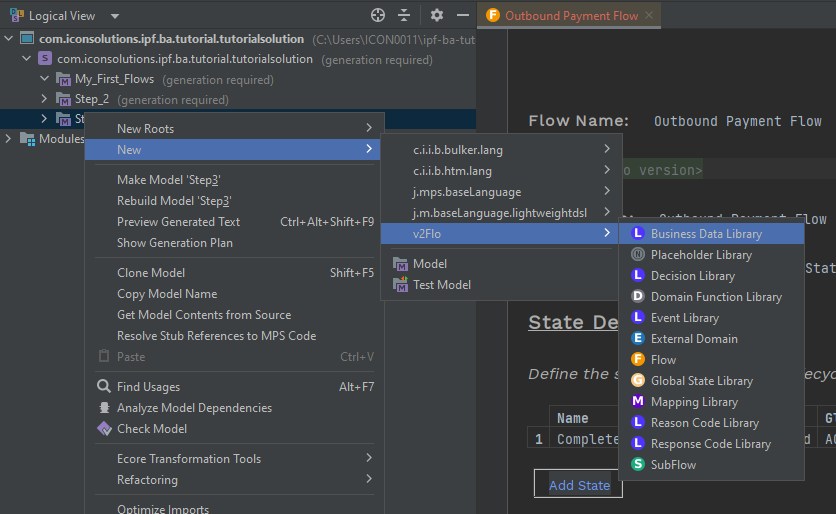
First, create a business data library to store the new business data. Start by selecting the flow node in the explorer and then right click and select "New>v2Flo>Business Data Library"
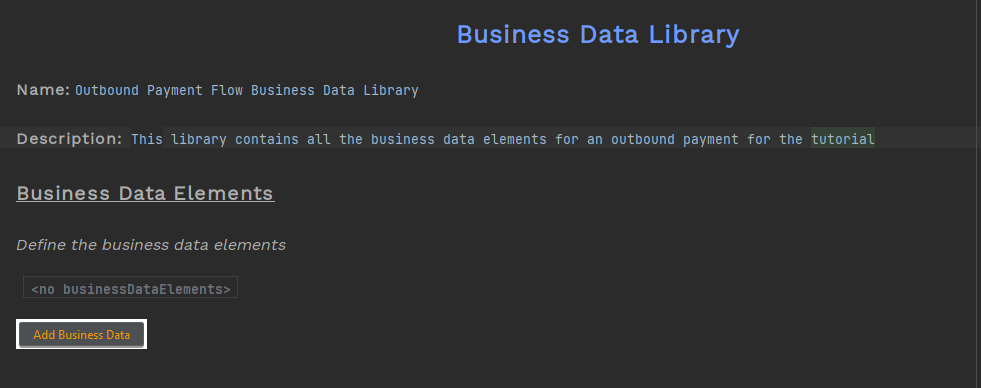
Enter a name and a description for your business data library. Let’s give it a name of "Outbound Payment Flow Business Data Library" and a description of "This library contains all the business data elements for an outbound payment for the tutorial".
When you have finished it should look like this:
Add ISO message elements to the Business Data Library
All the data you need for this flow is contained within the Pacs008 and you could simply use the entire Pacs008 throughout the flow. However, in real life, you will make calls out to other systems using a subset of the data contained in the Pacs008. Although at this stage you do not know how the flow is going to develop, lets add in some further business data that are commonly used in a request to an accounting system. By defining this data as separate to the Pacs008, it will be easier to see in the flow what data is used for different requests.
Open up the Outbound Payment Business Data Library and then add following business data elements:
-
Debtor Account
-
Debtor Agent
-
Payment Amount and Currency
You will not see the ISO Data Types that want immediately, you will need to Import them first by:
-
Place the cursor in the 'Data Type' cell
-
Press Ctrl+R
-
Start typing the ISO message component or element that you require (e.g. CashAccount)
-
Select the ISO data type you required (e.g. CashAccount38)
-
Press Return
-
Press kbd:Ctrl+Space in the same cell
-
The data type you are looking for should now be available to select.
Once updated the Business Data Library should look like this
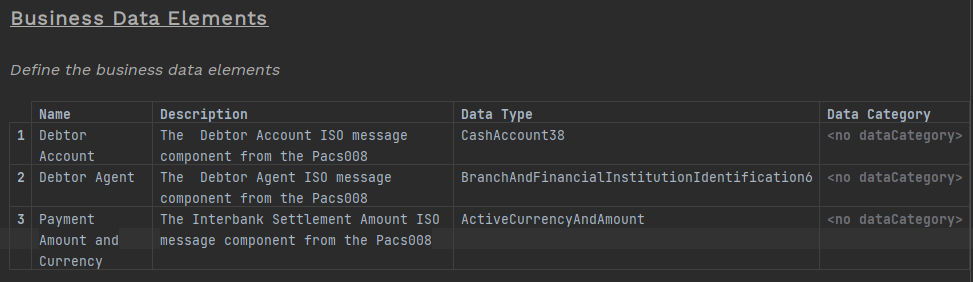
IPF comes with a data model that has a Message Data Structure -the message(s) that are used to initiate a flow and a Processing Data Structure - the data this subsequently received from external domains (see later) or generated that is used in the flow. You will also see a category of 'Additional Identifier' which would be used if the data is a client-specific identifier that you you wanted to be able to search on using the IPF Operational Dashboard or your own GUI.
Since this data is already contained in the message that initiates the flow we won’t assign it a data category.
Update Business Data Library with a Response
You will update the use case so that, when an account validation request is received by the debtor agent’s accounting system, it will automatically reserve funds, update the intra-day balance and provide a reservation reference in response.
You will use that reservation reference later, so lets also add that to the Business Data Library.
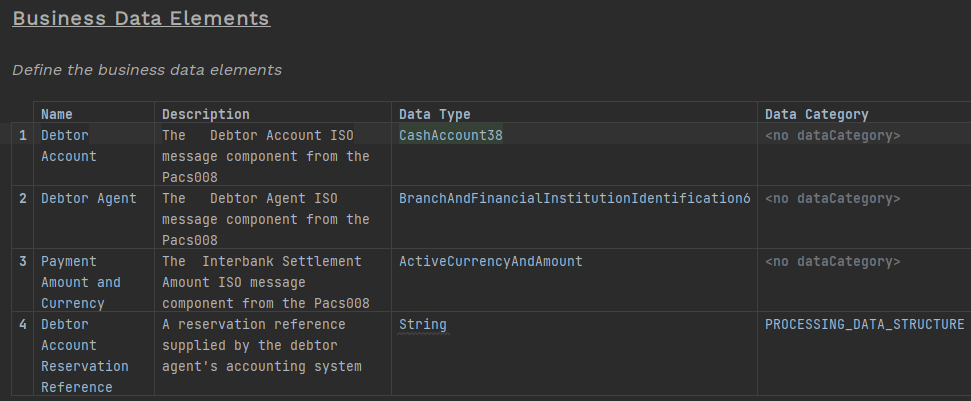
| The data category for the debtors account reservation reference is PROCESSING_DATA_STRUCTURE as this is new data that wasn’t present in the original Pacs008 message. |
Add a Mapping Function Definition
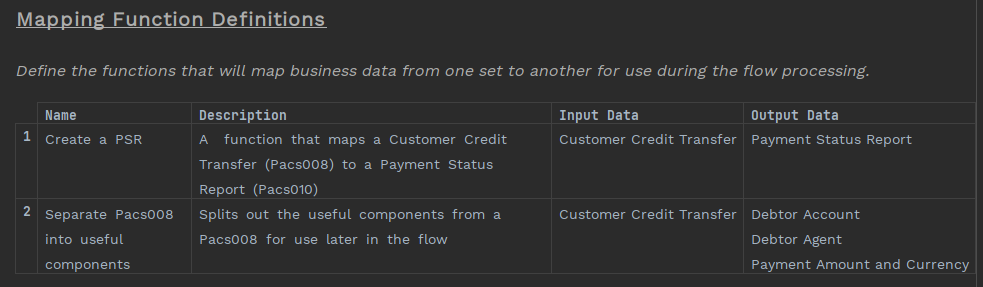
You have used a mapping function definition before (for the Pacs002 used in the notification). In your use case you will be breaking up the Pacs008 upon initiation of the flow so that you can use those data elements in subsequent calls.
From the Flow:
-
Find 'Mapping Function Definition'
-
click on 'Add Function'
-
add a name and description for the function
-
press Ctrl+Space in the 'Input Data' cell
-
select the data you want to be transformed - in this case 'Customer Credit Transfer'
-
Ctrl+Space in the 'Output Data' cell
-
select the data you want the input to be transformed into…in this case the data elements added to the business data library previously
Your function definition should look like this:
And now you need to call the function from the Initiation Behaviour so that the data is available when the flow is initiated.

You have chosen not to use 'Perform Enrichment' as there is no need to persist the data. Its already available in the Customer Credit Transfer, and you are splitting it to make the data in the flow more explicit - there’s no 'new' data that needs storing.
Update the Flow
You have created more business data and built another mapping function - now you need to update the flow to add this business data.
External Domain
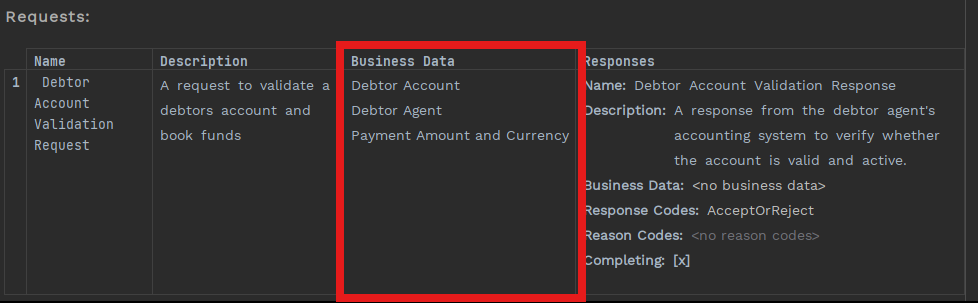
Now you have extracted some data elements from the Pacs008, you can add the business data to the request. In this use case you will assume that Debtor Account, Debtor Agent (e.g. BIC) and the Payment Amount and Currency are needed.
The actual mapping of the data will be done in the connector, not in Flow Designer.
Go to the 'Debtor Agent’s Accounting System' external domain and add the business data to the request that is already there:
Event Definition
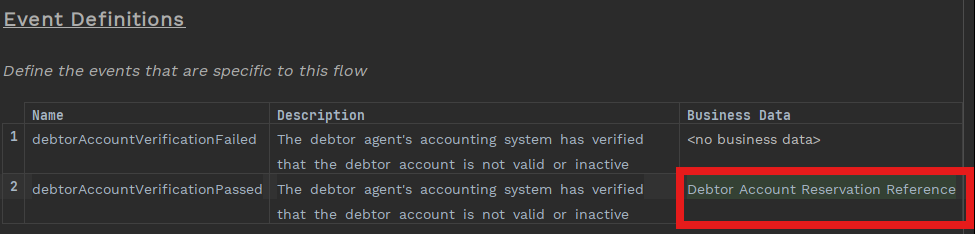
Now you can add data to any events in the 'Event Definition' section of the flow.
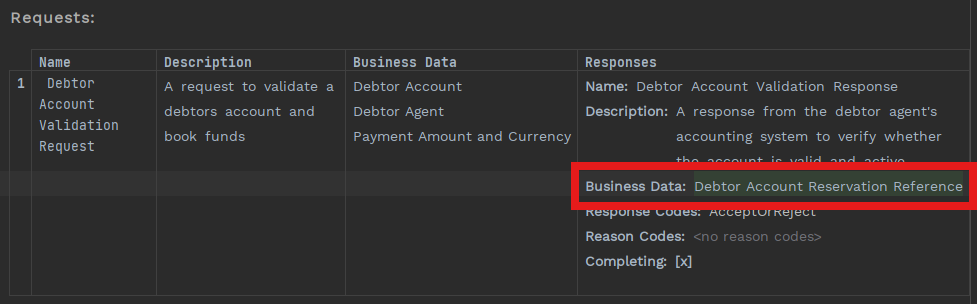
You added a new business data element - the 'Debtor Account Reservation Reference' - earlier. You now need to add it to an event to ensure that is available later in the flow. To be able to add it to an event, you also need to add the data to the response that triggers the event.
First, lets update the response to include the reservation reference:
Since you get the reference in the response to a passed debtor account verification, lets add it to that event.