DSL 2 - Opening the Sample Project
|
Getting Started
The tutorial step uses the "initial" solution. |
In Reviewing the initial tutorial application we looked at the basic project setup and started a flow and ran a payment through it whilst in DSL 1 - Introducing Icon’s DSL we learnt about the basic concepts that make up the payments DSL.
Flow’s are maintained through the Jetbrains product MPS which then uses Icon’s DSL. Please ensure you have downloaded the correct version of MPS stated in home.adoc#_setting_up_your_own_environment
This section of the tutorial is a beginner’s guide to opening the sample flow in MPS and learning basic navigation around it’s constituent parts.
Opening the Flow
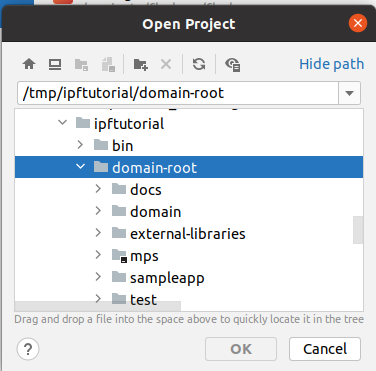
To start with, let’s open our flow. For this we start the Jetbrains MPS product and you should be prompted to open a project:

As we are using an existing project, we’ll click "Open" here to view our ipf-tutorial project. To open our project we need to navigate to the domain-root/mps directory in our project [<tutorial-install-root>/solutions/initial/domain-root/mps]. It will be highlighted with a small black square in the corner of the directory name, indicating that MPS can identify the directory as the root of an MPS project.
Project Structure
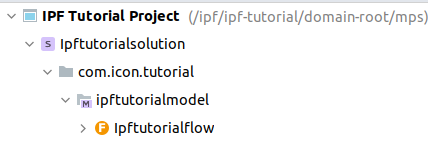
When the project opens up you should be able to see in the project view on the left:
|
Troubleshooting
If you haven’t previously built your application (for example if you’ve come straight from the solution) you may see this when you open the project: 
This means that the language hasn’t been built yet, to fix this simply run from the root of the project. If you need to, building and running instructions are covered in more depth during: Reviewing the initial tutorial application |
Let’s take a quick moment to discuss the way this is structured.
-
You’ll start at the lowest level - the
Ipftutorialflow. Note the "F" symbol here which denotes that the "Ipftutorialflow" is a flow, we’ll see as we expand and add concepts into our solution that other components have different symbols to declare easily what they are! -
Our flow is contained in
ipftutorialmodel- a model is a grouping container that allows us to associate flows together. From an application perspective, we work at the model level so all the interaction is done at that level. You’ll introduce the concept of the domain class - which represents the single interface into a model - later. -
Our model is contained in
Ipftutorialsolution- a solution is a grouping of models, the key thing to be aware of solutions is that they are built together and so it is easy to share components of different models within different solutions. -
Finally our solution is contained in "IPF Tutorial Project" - a project is simply a collection of solutions.
Generally speaking, most applications we’ll build will effectively works as a project - single solution - single model - one (or more) flows setup. You’ll introduce in Reviewing the initial tutorial application how we can share models across different projects.
|
At the top of the project view, we can see that we’re currently in the "logical view". This is the best view for navigating around and working with the DSL. There are also other views available: 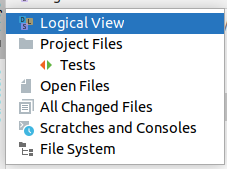
These allow us to view our components in different ways, for example looking at the raw files on the File System. This is most useful when trying to review how the generated code looks and is structured. |
Viewing the Flow
Now, let’s have a look at our flow. If we double click on it in the project view then we should bring up our flow in the main window:
As you scroll down the flow, hopefully we’ll start seeing sections to represent the concepts we reviewed in the previous section of the tutorial series.
The Flow Viewer
Lets start by clicking anywhere on the flow tab, and using the main toolbar to choose Tools > Open Flo Viewer. This should show a new tab on the screen which displays a diagram of our flow:

So here we can see we have a very simple flow that receives an initiation request, creates the "Flow Initiation" event and then immediately completes. It’s effectively the simplest flow we can have.
|
The flo-viewer by default opens inline a separate tab. If you want, you can click on the little cog in the top right hand corner: 
And then choose to for example undock it which allows you to move the flo viewer. This is great when working with multiple screens! |
One of the key features of the flo viewer is that is is updated in real time as your editing your flow! That means you can see live how the changes you are making to your flow definition impacts the flow in a graphical manner.
Intentions
For those familiar with JetBrains products, you may have already come across intentions. These are shortcut functions that are there to provide quick and easy access to common utilities. The Icon DSL has a number of different intentions throughout to try and help make things that little bit easier. You can access the intentions from anywhere by pressing Alt+Enter. If you do this now we’ll see:
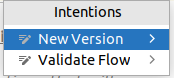
So here we can see we have two intentions, one to create a new version of the flow (we’ll do this in DSL 8 - Versioning) and one to validate the flow (we’ll use this a lot throughout the tutorial series!)
The other thing to note about intentions is that they are specific to what you are currently doing, so as we’ll see in later sections the intention list can provide a whole host of useful little tricks that are specific to what you’re trying to do at that time!
Inspecting the Flow
Now that we have a flow it’s time to build it. First lets check our settings, on the top menu go to Build and ensure that both "Save Transient Models" and "Check models before generation" are selected.
-
The "Check models before generation" option makes MPS validate your model before it tries to build it. Any errors will then be displayed back to you - you can then click on them to be taken to the problem so you can resolve it.
-
The "Save Transient Models" option makes MPS show you all the steps it’s taken to generate the code. Normally we don’t need this, but we’re setting it here as a way to help you understand what has been done during the build.
Let’s build our flow by right-clicking on the Ipftutorialmodel model and click rebuild model ipftutorialmodel. This will take a few seconds, then once finished in the navigator expand out the final transient:
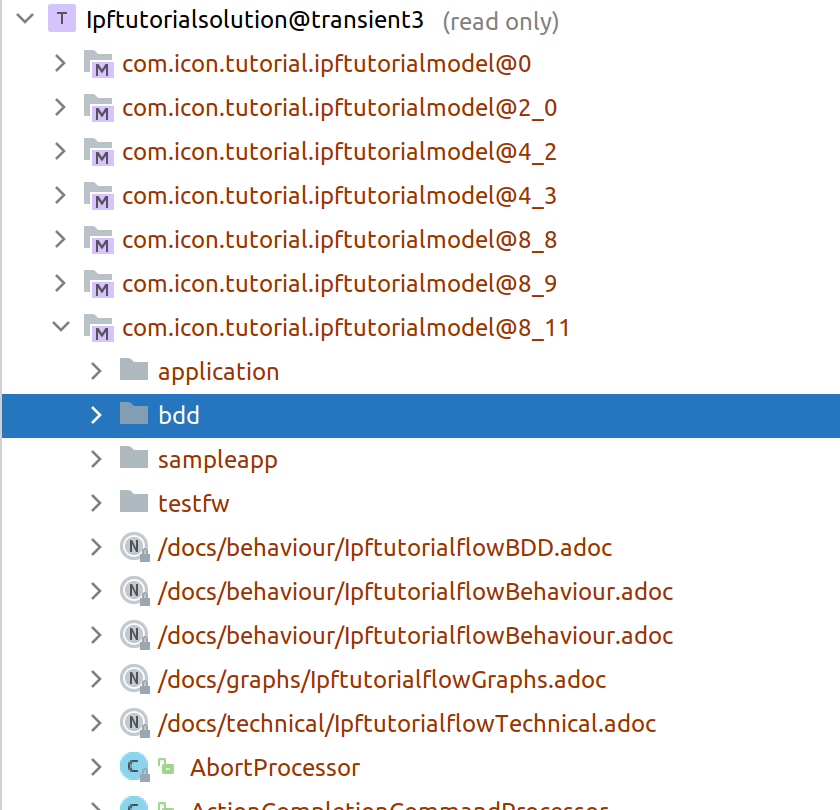
Inspecting the generated artefacts
Here you can see some of the artefacts that have been generated for the flow, these include:
-
All of the application code - this includes
-
The generated AKKA Event Sourced Behaviour
-
All the generated ports that the application needs to integrate to
-
The generated domain class that allows external interaction to the flow.
-
-
The generated documentation
-
The generated BDD Test Classes
-
The generated sample implementations of the ports created.
Have a look at some of these artefacts, they will be discussed in greater depth in future sections.