Debulker Client Processing
An instance of the Debulker can split large files into components driven by its configuration (see previous section Using Debulker). Those components can then be processed individually through applications or flows. This section of the tutorial demonstrates how to process components after a file has been debulked.
| The following assumes you are either following the add-debulker solution or have completed the previous section Using Debulker |
Debulked Component Processing
When a file is debulked its components are added to the component store (currently implement as a MongoDB store - you can see the "componentEntity" collection if you completed the previous section). This means those components are available to be accessed by applications outside of the Debulker. In order to know when components are available for processing the Debulker will issue a InitiateComponentProcessingCommand. This can be consumed by the client application/flow and informs the client a bulk has been received, debulked and the components are ready for processing.
The message sent gives the bulkId:
{"bulkId":"pain.001.12345"}Using this bulkId the client application can query the Component Store and use the following operation to access the components related to that bulk:
Flow.Publisher<Component<T>> findAllByBulkId(BulkId bulkId);Alternatively, it’s possible to query the component store specifying the bulkId and the marker for the component/s to be retrieved. This is the method that is used by the Pain001Processor to retrieve the root component to be processed.
Flux<Component<T>> findAllByBulkIdAndMarkerFlux(BulkId bulkId, String marker);Coding Component Processing
In order to process the InitiateComponentProcessingCommand notification and access the components we, at the minimum, need to code the following:
-
Receiving Connector
-
Call to Component Store to retrieve components
-
Processing for each component retrieved
Each of these can be coded as part of the client application or an IPF flow. The choices for this depend on what orchestration you need to do to process the components, but its quite likely the processing of each component will be via an IPF flow.
For the purposes of this example the receiving connector and the component store call are implemented in Java only (within the same debulker application) and an IPF flow is initiated for each transaction level component of the pain.001 being debulked.
| There is nothing to stop the processing of the InitiateComponentProcessingCommand and retrieval of components also being via an IPF Flow, the underlying Java code would be largely the same. |
Receiving Connector
The implementation of the Connector for this tutorial example can be found in the ipf-debulker-tutorial-app config/connector/DebulkerNotificationConnector.java, this is a simple ReceiveConnector<InitiateComponentProcessingCommand>. The more interesting part is the processing for each notification received and is implemented in the receive handler in the same class:
    // ReceiveHandler
    private CompletionStage<Void> componentProcessingReceiveConnector(ReceivingContext receivingContext, InitiateComponentProcessingCommand componentProcessingCommand) {

        return CompletableFuture.supplyAsync(() -> {
            log.info("InitiateComponentProcessingCommand received for bulkId {} ", componentProcessingCommand.getProcessingContext().getClientRequestId().getValue());
            Pain001Context pain001Context = Pain001Context.builder()
                    .marker("Document")
                    .processingContext(componentProcessingCommand.getProcessingContext())
                    .build();
            componentProcessor.process(componentProcessingCommand.getProcessingContext(), pain001Context); (1)
            return null;
        });
}| 1 | The component processor is injected in via Spring Call process on the ComponentProcessor passing the complete processingContext which contains the bulkId (processingContext.clientRequestId.value). The second parameter, which is a context object can be used to pass additional parameters, e.g. parentId from child component processors. |
Configuration
The Receive Connector will also need configuration in the application to know which topic to access. For the tutorial this is configured to access the default topic for this notification (and placed into the ipf-debulker-tutorial-app application.conf):
client-processing.connector {
  kafka {
    consumer {
      topic = CLIENT_PROCESSING_REQUEST
    }
  }
}
Component Processor - Java
Component Processors should be defined for each level defined in the component hierarchy.
In the provided example, there are three levels defined in the config:
-
Document
-
CstmrCdtTrfInitn.PmtInf
-
CdtTrfTxInf
The ipf-debulker-starter module includes a ComponentProcessor, to define a specific processor, simply extend this class.
Document Component Processor
public class Pain001Processor extends ComponentProcessor<Document, Pain001Context> { (1)

    private final Pain001PaymentInstructionProcessor nextProcessor;

    public Pain001Processor(ComponentStore<NoCustomData> componentStore, Pain001PaymentInstructionProcessor nextProcessor) {
        super(componentStore, Pain001Processor::map, true); (2)
        this.nextProcessor = nextProcessor;
    }

    // Used to unmarshall the XML to an iso20022 model object
    private static Document map(String xmlString) {
        String PAIN_001_NAMESPACE = "urn:iso:std:iso:20022:tech:xsd:pain.001.001.09";
        XMLMapper xmlMapper = new XMLMapper();
        xmlMapper.registerDocumentClass(PAIN_001_NAMESPACE, Document.class);
        return xmlMapper.fromXML(xmlString, Document.class);
    }

    @Override
    protected Class<Document> getTargetClass() {
        return Document.class;
    }

    @Override
    protected CompletionStage<Done> handle(Pain001Context result) { (3)
        Document unmarshalledComponent = xmlMapper.apply(result.rawContent()); (4)
        Pain001PaymentInstructionContext pain001PaymentInstructionContext = Pain001PaymentInstructionContext.builder()
                .parentId(result.componentId())
                .processingContext(result.processingContext().withUnitOfWorkId(UnitOfWorkId.createRandom()))
                .parentMarker(result.marker())
                .build();
        return nextProcessor.process(result.processingContext(), pain001PaymentInstructionContext) (5)
                .thenApply(__ -> new Done("", "", "", Done.Result.EXECUTED)); (6)
    }

    @Override
    protected Function<Pain001Context, ComponentId> getParentComponentId() { (7)
        return null;
    }

    @Override
    public Function<Pain001Context, String> getMarker() { (8)
        return Pain001Context::marker;
    }

    @Override
    protected Function<Component<NoCustomData>, Pain001Context> transformComponent(Pain001Context additionalData) { (9)
        return component -> additionalData.toBuilder()
                .componentId(component.getId())
                .marker(component.getMarker())
                .rawContent(component.getContent())
                .build();
    }
}| A root component is one which doesn’t have a parent |
| 1 | The first type parameter is the type associated to the unmarshalled content of the component and the second type is the type associated to the component context. The component context is defined as a separate record class Pain001Context in this case and facilitates passing additional context data with the component retrieved from the component store. The data defined in the record will vary depending on what data needs to be passed with the component. |
| 2 | The third constructor parameter indicates that this is a root component processor. This affects the query used to retrieve the components from the component store. Note that root component processors are expected to only return a single component |
| 3 | The handle method is called for each component that is retrieved from the component store, and specifies the processing that should occur on each component. In this case we are calling the next level of processing (payment instruction) |
| 4 | While not used in this example, it’s possible to unmarshall the raw content retrieved from the component store, this could be useful if there is a need to retrieve data from the raw content. |
| 5 | The next processor is called directly here, but this could also be done via an MPS flow |
| 6 | Since we are not calling an MPS flow, we are creating a "dummy" Done object, as this would normally be returned by an invocation of a flow |
| 7 | Since this is a root component processor, there is no parentId |
| 8 | The marker is used in addition to the bulkId to retrieve the root component from the component store |
| 9 | This method allows for enriching the data retrieved from the component store with additional information |
Payment Instruction (PmtInf) Component Processor
public class Pain001PaymentInstructionProcessor extends ComponentProcessor<PaymentInstruction30, Pain001PaymentInstructionContext> { (1)

    private final Pain001TransactionProcessor nextProcessor;

    public Pain001PaymentInstructionProcessor(ComponentStore<NoCustomData> componentStore, Pain001TransactionProcessor nextProcessor) {
        super(componentStore, Pain001PaymentInstructionProcessor::map, false); (2)
        this.nextProcessor = nextProcessor;
    }

    // Used to unmarshall the XML to an iso20022 model object
    private static PaymentInstruction30 map(String xmlString) {
        String PAIN_001_NAMESPACE = "urn:iso:std:iso:20022:tech:xsd:pain.001.001.09";
        XMLMapper xmlMapper = new XMLMapper();
        xmlMapper.registerDocumentClass(PAIN_001_NAMESPACE, PaymentInstruction30.class);
        return xmlMapper.fromXML(xmlString, PaymentInstruction30.class);
    }

    @Override
    protected Class<PaymentInstruction30> getTargetClass() {
        return PaymentInstruction30.class;
    }

    @Override
    protected CompletionStage<Done> handle(Pain001PaymentInstructionContext result) {
        PaymentInstruction30 unmarshalledComponent = xmlMapper.apply(result.rawContent());
        Pain001TransactionContext pain001TransactionContext = Pain001TransactionContext.builder()
                .parentId(result.componentId())
                .parentMarker(result.marker()) (3)
                .processingContext(result.processingContext().withUnitOfWorkId(UnitOfWorkId.createRandom()))
                .build();
        // We are calling the next level processor directly, but you could do this via an MPS flow also
        return nextProcessor.process(result.processingContext(), pain001TransactionContext)
                .thenApply(__ -> new Done("", "", "", Done.Result.EXECUTED));

    }

    @Override
    protected Function<Pain001PaymentInstructionContext, ComponentId> getParentComponentId() { (4)
        return Pain001PaymentInstructionContext::parentId;
    }

    @Override
    public Function<Pain001PaymentInstructionContext, String> getMarker() {
        return pain001TxContext -> pain001TxContext.parentMarker() + ".CstmrCdtTrfInitn.PmtInf"; (5)
    }

    @Override
    protected Function<Component<NoCustomData>, Pain001PaymentInstructionContext> transformComponent(Pain001PaymentInstructionContext additionalData) {
        return component -> additionalData.toBuilder()
                .componentId(component.getId())
                .marker(component.getMarker())
                .rawContent(component.getContent())
                .build();
    }
}| 1 | As with the Pain001Processor, generic type arguments are required here. In this case the unmarshalled type is a PaymentTransaction39 and a new Pain001PaymentInstructionContext record type is defined to pass the payment instruction component with additional data. |
| 2 | Since payment instruction components do have a parent, the rootComponentProcessor indicator is set to false |
| 3 | Creation of a new context object here, that is for use for the next level of processing (transaction level processing). Setting the parentMarker from the current context |
| 4 | Passed from point 3 this is used in the query to retrieve the relevant components from the component store |
| 5 | Dynamically building the marker based on the parent marker and the suffix which identifies the current level of component |
Transaction (CdtTrfTxInf) Component Processor
public class Pain001TransactionProcessor extends ComponentProcessor<CreditTransferTransaction39, Pain001TransactionContext> { (1)

    public Pain001TransactionProcessor(ComponentStore<NoCustomData> componentStore) {
        super(componentStore, Pain001TransactionProcessor::map, false); (2)
    }

    // Used to unmarshall the XML to an iso20022 model object
    private static CreditTransferTransaction39 map(String xmlString) {
        String PAIN_001_NAMESPACE = "urn:iso:std:iso:20022:tech:xsd:pain.001.001.09";
        XMLMapper xmlMapper = new XMLMapper();
        xmlMapper.registerDocumentClass(PAIN_001_NAMESPACE, CreditTransferTransaction39.class);
        return xmlMapper.fromXML(xmlString, CreditTransferTransaction39.class);
    }

    @Override
    protected Class<CreditTransferTransaction39> getTargetClass() {
        return CreditTransferTransaction39.class;
    }

    @Override
    protected CompletionStage<Done> handle(Pain001TransactionContext result) { (3)
        CreditTransferTransaction39 cdtTrfTxInf = xmlMapper.apply(result.rawContent());
        String unitOfWorkId = UUID.randomUUID().toString(); // UOW Id to uniquely identify a request.
        String clientRequestId = cdtTrfTxInf.getPmtId().getEndToEndId(); // Payment related Id

        log.info("cdtTrfTxInf is instance of CreditTransferTransaction - initiate flow to process, UOW Id {}", unitOfWorkId);

        return DebulkerModelDomain.initiation().handle(new InitiateProcessDebulkedComponentsInput.Builder() (4)
                .withProcessingContext(ProcessingContext.builder()
                        .unitOfWorkId(unitOfWorkId)
                        .clientRequestId(clientRequestId)
                        .build())
                .withIsoCreditTransferComponent(cdtTrfTxInf)
                .withPaymentJourneyType("PAYMENT")
                .build()
        ).thenApply(report -> {
            log.debug("{}: Transaction Validation outcome is {}", cdtTrfTxInf.getPmtId().getEndToEndId(), report.getResult());
            return report;
        });

    }

    @Override
    protected Function<Pain001TransactionContext, ComponentId> getParentComponentId() {
        return Pain001TransactionContext::parentId;
    }

    @Override
    public Function<Pain001TransactionContext, String> getMarker() {
        return pain001TransactionContext -> pain001TransactionContext.parentMarker() + ".CdtTrfTxInf";
    }

    @Override
    protected Function<Component<NoCustomData>, Pain001TransactionContext> transformComponent(Pain001TransactionContext additionalData) {
        return component -> additionalData.toBuilder()
                .componentId(component.getId())
                .marker(component.getMarker())
                .rawContent(component.getContent())
                .build();
    }
}| 1 | Pain001TransactionContext serves as a mechanism to pass data from the previous level of processing e.g. parentMarker |
| 2 | Since transactions have a parent, this is not a root component processor |
| 3 | In this case the processing for each component retrieved involves invoking a ProcessDebulkedComponents MPS flow |
| 4 | MPS flow is initiated here, using unmarshalled transaction component content retrieved from the component store |
Component Processing Flow - ProcessDebulkedComponents
We won’t go into great detail on this flow, as its created to give a working example and demonstrate how we go from components debulker into the Component Store, to initiating flows to process each component.
The core reason for creating this flow is to give the link between the Component type and doing some sort of processing within an IPF flow. What that subsequent processing is depends on your usecase, but this example is now capable of processing a Customer Credit Transfer from the debulked file.
Lets take a quick look at the important parts of the flow example to join the dots.
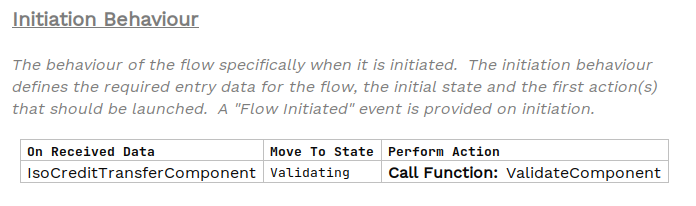
This data type ('On Received Data') is essentially wrapping the CreditTransferTransaction39 and has been implemented as a Business Data Library (we didn’t have to do this, we could have used the CreditTransferTransaction39 directly but this shows you could define your own type aligned to the component you are processing).

The rest of the flow processing is largely academic but a validation step is added to actually access the data, this is a the domain function:

The Java implementation of the validation simply accesses the Credit Transfer objects EndToEndId and logs this:
public class DebulkerComponentsFunctionsAdapter implements DebulkerComponentsFunctionsPort {
@Override
public CompletionStage<ValidateComponentResponseInput> execute(ValidateComponentAction validateComponent) {

        if (validateComponent.getIsoCreditTransferComponent().getPmtId().getEndToEndId() != null ) {
            // accept if E2E ID populated (crude but does something with the data supplied to prove processing for now)
            log.info("Component is valid - E2E ID is populated {} for Event ID {} & UOW Id {}",
                    validateComponent.getIsoCreditTransferComponent().getPmtId().getEndToEndId(),
                    validateComponent.getId(),
                    validateComponent.getProcessingContext().getUnitOfWorkId());

            return CompletableFuture.completedStage(new ValidateComponentResponseInput.Builder(validateComponent.getId(), AcceptOrRejectCodes.Accepted).build());
The ipf-debulker-tutorial-app requires MongoDB, Kafka and the DebulkerModelDomain to have been configured (see class app/config/ProcessDebulkedConfig). None of this is covered in detail here, but the code can be found in the add_debulker solution and details on the principles for those steps are covered in earlier tutorial modules (see DSL 3 - Using a Domain Function, DSL 12 - Using custom business data, & CON2 - Writing your own connector (Kafka)).
Running the application
You can start application.yml using next command:
docker-compose -f application.yml up -dTesting the application
Now the application is started we can test it (similarly to the previous section Using Debulker, this is done by:
-
Providing a source data file in the expected location (we will use a more complete file this time).
-
Sending a FileNotification to the ipf-debulk, via Kafka, to notify the application a file is ready for processing.
-
Validating that the file is debulked, checking the Component Store.
-
Validating the Components have been retrieved from the Component Store, by our application.
-
Validating the Components have been processed through the new IPF flow ProcessDebulkedComponents.
Step 1 - Creation of pain.001 file which will be debulked
For this testing we will use a richer version of the PAIN.001 and include some more attributes within the Credit Transfer component.
An example file is included - pain_001_test_full.xml
This file is already created and it is located in the solutions/add-debulker/docker/bulk_files/ directory.
Step 2 - Sending FileNotification to Kafka
We have configured the application to take FileNotifications from Kafka, that notification has several properties which must be provided:
-
configName - name of the configuration which will be used by debulker to debulk the bulk file into components.
-
bulkId - to correlate produced components by debulker.
-
fileProvider - name of the provider which will be used to retreive the bulk file for processing.
-
filePath - path to the file.
FileNotification message to send:
{
  "configName": "pain.001.001.09",
  "bulkId": "pain.001.99999",
  "fileProvider": "local",
  "filePath": "/tmp/bulk_files",
  "fileName": "pain_001_test_full.xml"
}
we can push the fileNotification to Kafka using Kafka console producer:
./kafka-console-producer.sh --topic FILE_NOTIFICATION_REQUEST --bootstrap-server localhost:9092Or using the provided kafka UI: localhost:8098/ui/clusters/local/all-topics/FILE_NOTIFICATION_REQUEST

Select Produce Message, specifying the below as the value, key can be left blank
Message we are sending should be in one line:
{"configName": "pain.001.001.09", "bulkId": "pain.001.99999", "fileProvider": "local", "filePath": "/tmp/bulk_files/", "fileName": "pain_001_test_full.xml"}
Step 3 Validating that the file is debulked
At this point the debulker should have received the notification, accessed the file and debulked it. For this tutorial and test the most important thing we are interested in validating is that the components should be present in the Component Store.
This is easily checked via component store REST API (as per the earlier tutorial for debulker - Validate File Debulk).
Run this from command line to get all components related to our bulk:
curl http://localhost:8080/v1/components/pain.001.99999 | json_ppThis should be the expected output for debulked pain_001_test_full.xml file. Critically there should be two components with the following marker, representing the Customer Credit Transfer:
"marker" : "Document.CstmrCdtTrfInitn.PmtInf.CdtTrfTxInf",And having content starting:
"content" : "<CdtTrfTxInf><PmtId><InstrId>...Step 4 Validating Component Retrieval and Flow Initiation
At this point there should also have been an InitiateComponentProcessingCommand sent to Kafka, and this should have been picked up by our application. Specifically it should have been through the receiveHandler we implemented. At the time of writing we can see this in the ipf-tutorial-debulking-app logs:
2023-06-06 06:20:38.767 INFO c.i.i.t.d.a.c.c.DebulkerNotificationConnector - InitiateComponentProcessingCommand received for bulkId pain.001.99999In the ComponentProcessor the flow initiation is logged:
2023-06-06 06:20:39.147 INFO c.i.i.t.d.a.c.Pain001TransactionProcessor - cdtTrfTxInf is instance of CreditTransferTransaction - initiate flow to process, UOW Id 938ece8d-bca8-47af-8f69-068b140319c3Step 5 Validate ProcessDebulkedComponents Flow processing
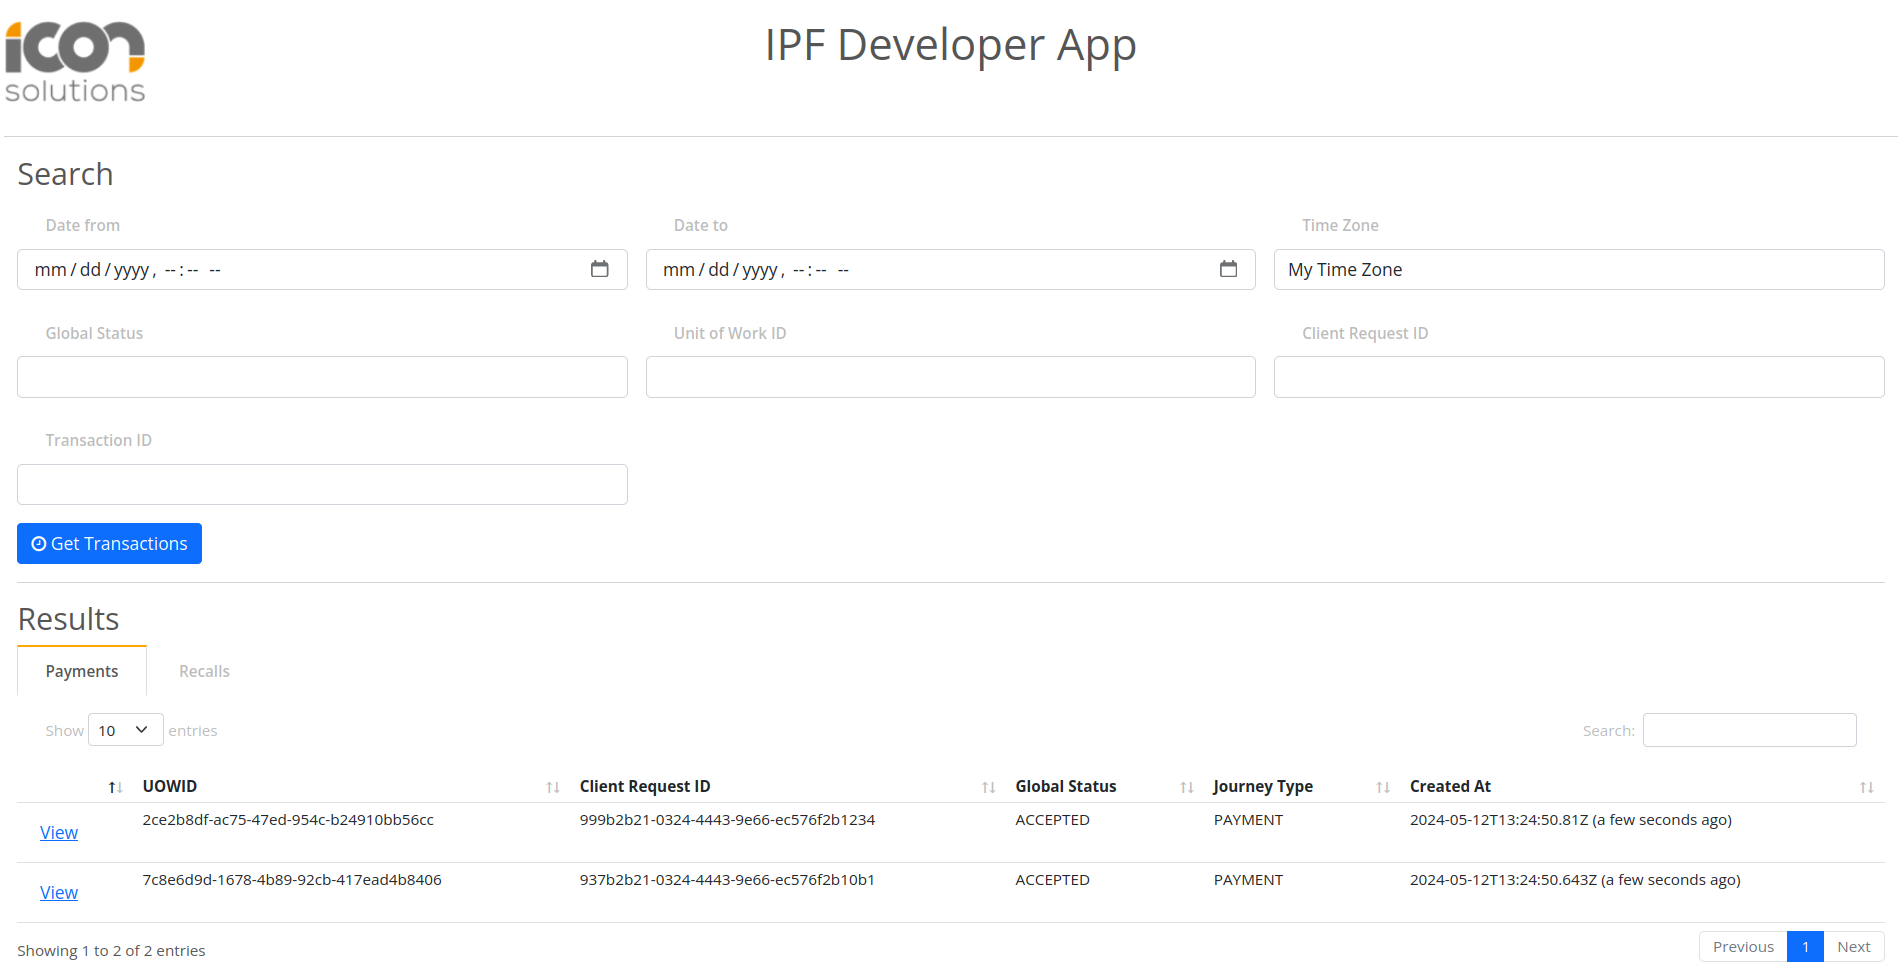
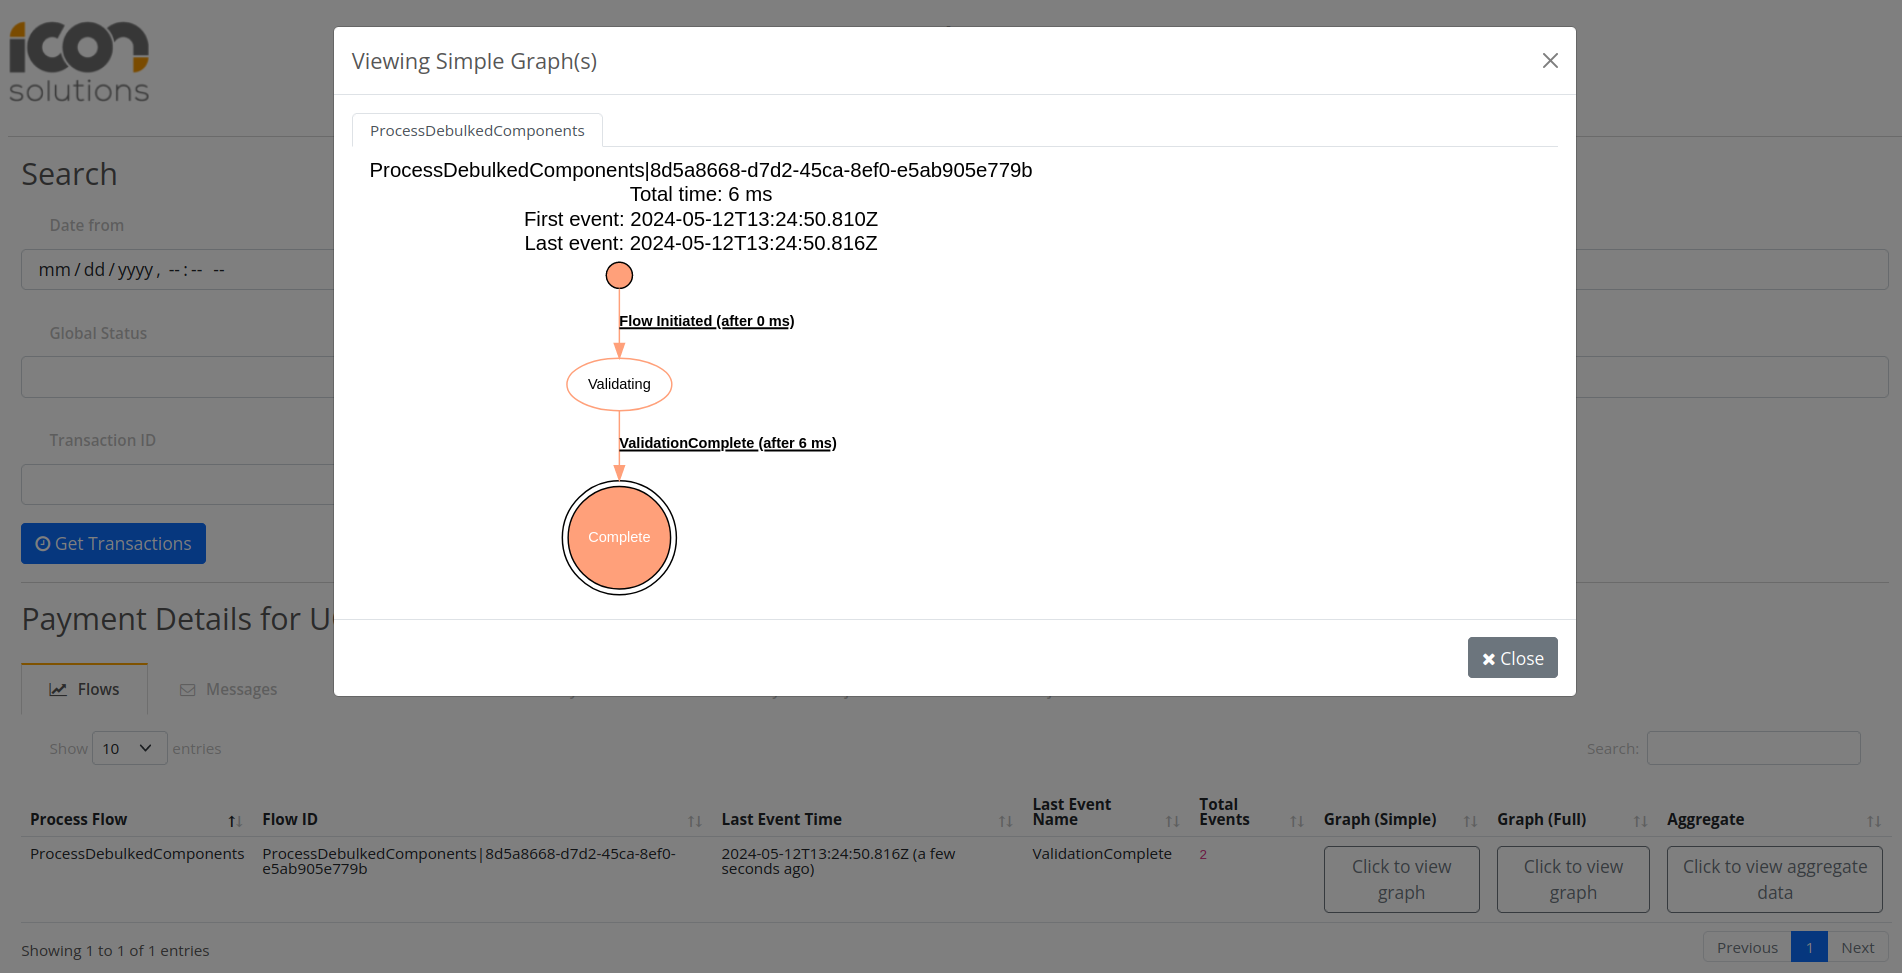
You can validate the processing of the component using IPF Developer App on localhost:8081
Upon clicking Get Transactions there should be two records associated to the two transaction level components that have triggered ProcessDebulkedComponents flow.
Conclusions
In this section we:
-
Shown how to process Debulked Components by processing the InitiateComponentProcessingCommand sent by the Debulker on completion.
-
Implemented code to access the Component Store and retrieve all components.
-
For each relevant component initiated an IPF flow.
-
Processed those components through an IPF flow.