Agent Clearing Settings
What is an Agent Clearing Setting
The Agent Clearing Setting User Interface (UI) is used to manage and configure the parameters that govern the payment clearing process between a principal entity (such as a payment service provider or a bank) and its agents. This UI is essential for ensuring accurate, efficient, and compliant transactions. Operators are able to use the UI to define one Clearing setting and adjust clearing options i.e. Cover Serial Method and Opening Time
| Contrary to Agent Settlement Settings, only one Clearing Setting can be associated with an Agent Setting. |
Managing Agent Clearing Settings
Creating and maintaining an Agent Clearing Setting is done from within the UI for a specific Agent Setting. Details on how to create an Agent Setting can be seen Agent Settings.
Create
Clicking the 'Create Agent Clearing Setting' link from within the Agent Clearing Setting card allows operators to initiate the creation of a new Agent Clearing setting. This action will open a form for the operator to complete with the required information. After filling out the form, the operator can click the 'Create' button to submit the new setting for approval.
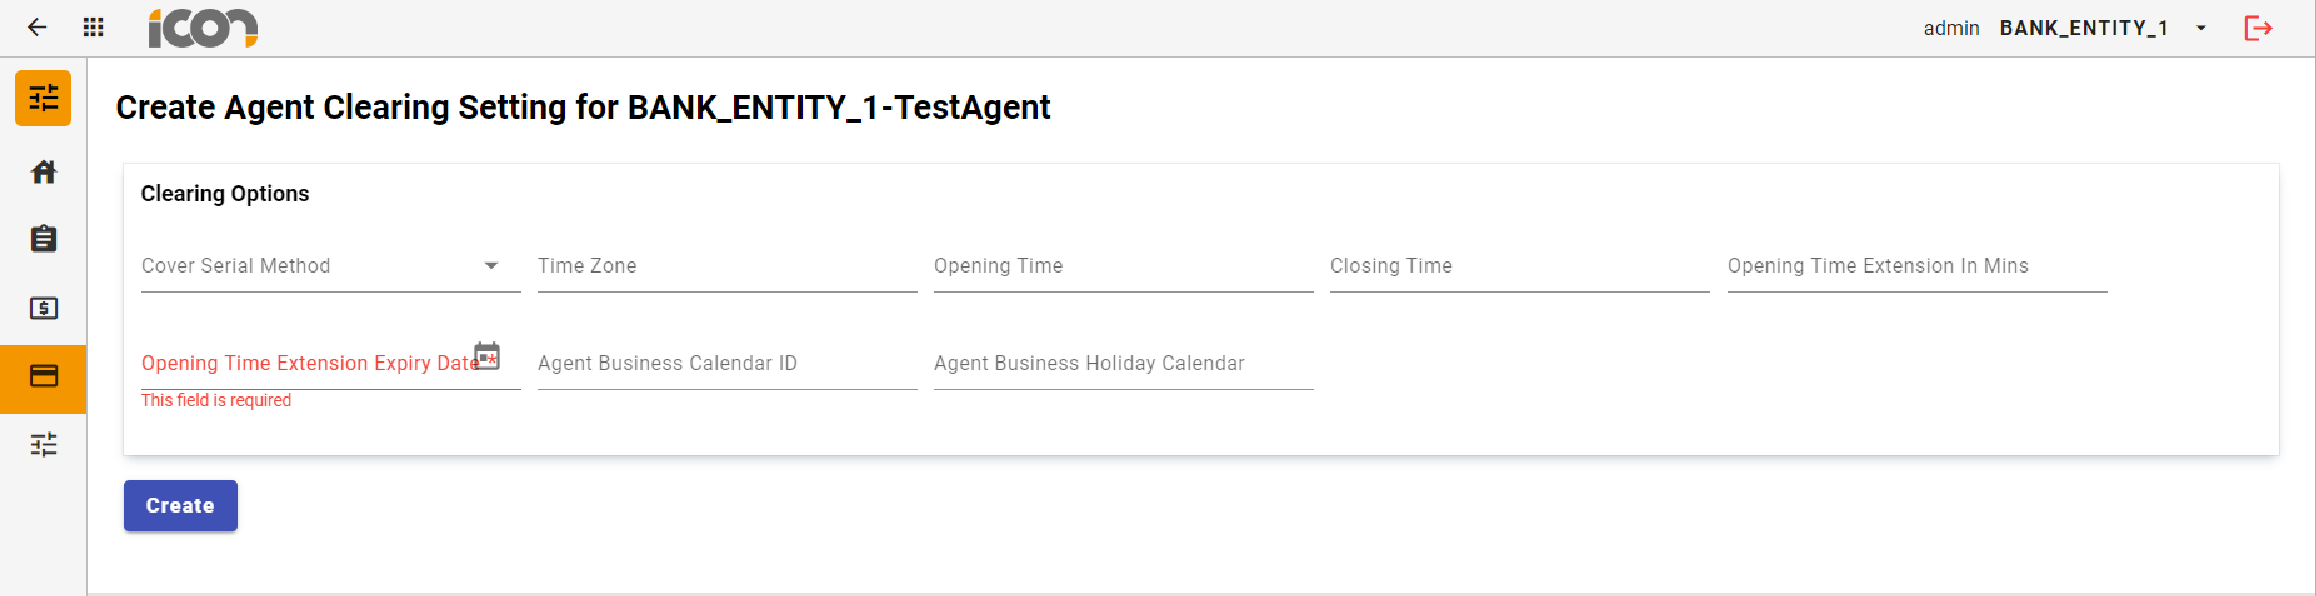
| Required fields are marked with an asterisk. Where required information has not been provided, an error will be displayed under the required field. |
Modification
Once a Clearing Setting is in a status of Active, options to edit or delete the record will be visible within the Agent Clearing Settings card.
Image: Agent Clearing Settings Modification
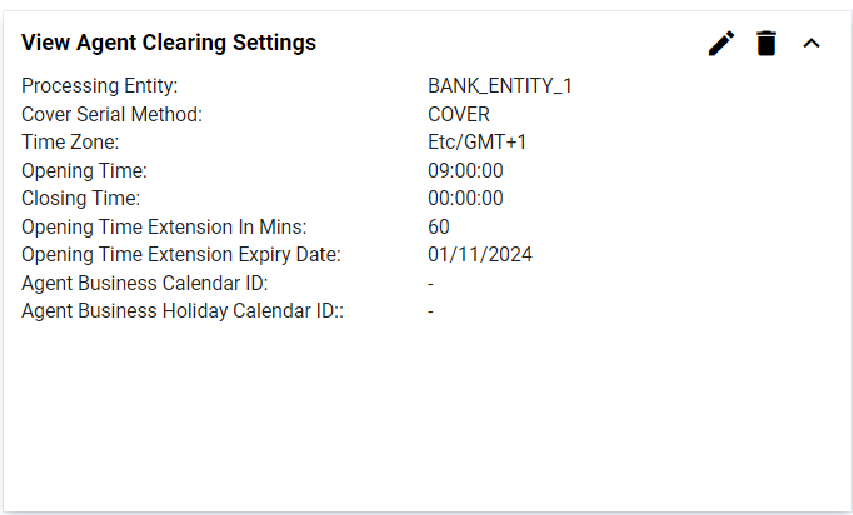
Clicking on the edit icon (pencil icon) allows operators to modify the record, navigating them to a screen displaying the current data input for the Agent. All fields except the Account ID and Transfer Direction can be modified. Upon clicking save, the changes will be stored and the record will transition to an 'Active Pending Approval' status. If required data is missing, errors will be displayed under the respective fields.
| To navigate out of the edit screen, operators can use the global back button located at the left hand corner of top navigation bar. |
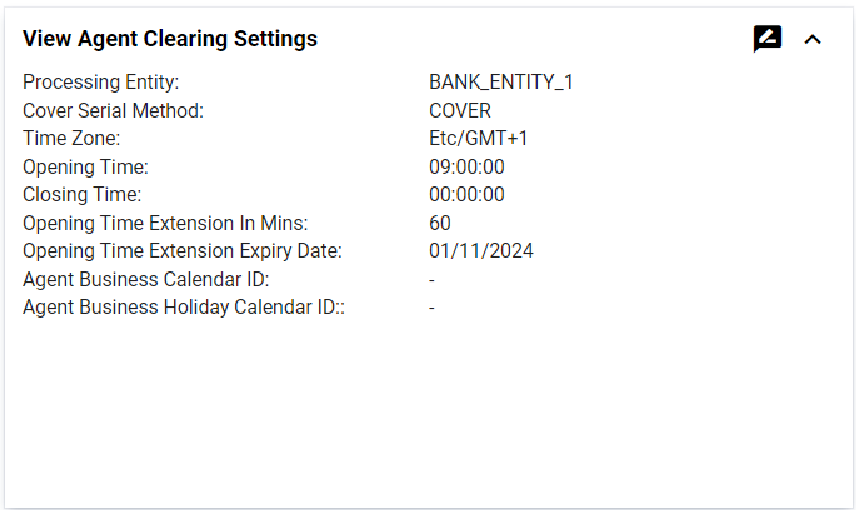
Clicking the delete icon (bin) initiates the deletion process, transitioning the record to an 'Active Pending Approval' status. Once the deletion is approved, the record will be permanently deleted.
Approvals
Upon creating, modifying, or deleting an Agent Clearing Setting, the record will transition to a 'Pending Approval' status. During this status, a review icon will be visible within the Agent Clearing Setting card.
Image: Agent Clearing Account Card - Review
When an operator clicks on the 'Review' icon the approval process will commence. A modal will display the record details, highlighting modifications: additions or changes in green and deletions in red. The operator can approve or reject the creation, modification, or deletion of the record, provide a reason for their choice, and confirm the action.
